Chef notes
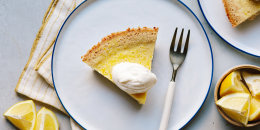
During the summer, turning on the oven for hours to bake a cheesecake is practically unfathomable! That’s where this luscious no-bake lemon cheesecake swoops in to save the day. Whereas baked versions get their structure from the eggs in the filling that are set when baked in the oven, no-bake cheesecakes get their body and structure from a combination of aerated cream cheese and whipped cream. Not to mention, these chilled versions are less finicky, less intimidating and, most importantly, just as creamy and delicious.
This summer-ready cheesecake is spiked with tart and tangy lemon to create a punchy and bright cheesecake that is much simpler to make than you might think. Though the method of preparation isn’t anything too out of the ordinary, a few ingredients and techniques set it apart to make the creamiest and most lush of no-bake desserts. This one starts with a buttery, no-bake graham cracker crust. Although many people use sugar in their no-bake crust, I skip it altogether as it tends to pull out moisture, which can result in a soggy crust.
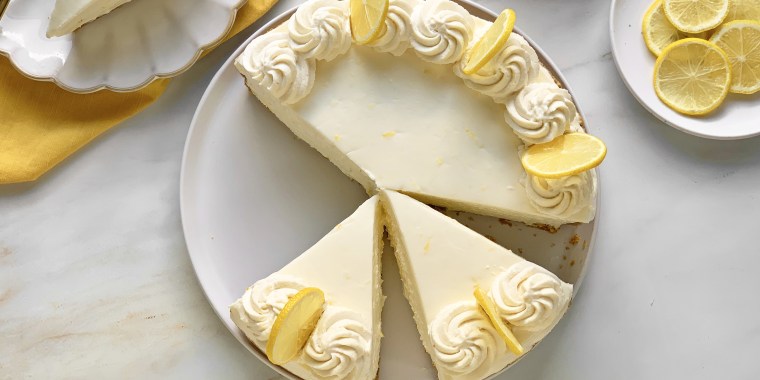
However, the filling is really where the magic happens. A higher ratio of cream cheese yields the best flavor and texture, resulting in a showstopping, lofty cheesecake. A combination of lemon zest and a generous amount of juice provides just the right punch needed to come through all that rich cream cheese. To get the most flavor from the lemons, rub the zest into the sugar to release the oils from the zest. Rather than using a paddle to beat the cream cheese (which can result in a loose filling), I use a whisk attachment to really aerate the cream cheese. Doing so creates a wonderful texture that closely mimics that of a baked cheesecake. Finally, folding a bit of sour cream into the filling provides softness and tang to accent the creamy texture and lemon-y punch. When combined, you get an aromatic, silky cheesecake perfect for those hot summer months.
Technique Tip: Using a food processor to make the crust is great because it ensures the crackers are finely ground and combine well with the melted butter. Don’t have one? No problem! You can finely crush the crackers in a zip-top bag with a rolling pin and incorporate with the butter in a separate mixing bowl.
Take care to really pack in the crust in the pan to ensure it’s not crumbly when you slice it.
This cheesecake is a delightful combination of tangy and sweet, but if you’re a little sensitive to that tart flavor, feel free to reduce the amount of lemon juice to 5 tablespoons.
If you don’t have a stand mixer, you can use an electric hand mixer and large mixing bowl to make the cheesecake filling.
Swap Option: If opting for store-bought graham cracker crumbs, you will need about 2 ⅓ cups to make the crust.
Ingredients
- 18 plain graham cracker sheets (about 10 ounces)
- 1/4 teaspoon kosher salt
- 8 tablespoons (1 stick) unsalted butter, melted
- 1⅓ cups heavy cream, chilled
- 1¾ cups granulated sugar
- 2 tablespoons lemon zest (from 2 medium lemons)
- 32 ounces cream cheese, room temperature
- 1/2 teaspoon kosher salt
- 6 tablespoons lemon juice (from 2 lemons)
- 1/2 teaspoon pure vanilla extract (optional)
- 1/3 cup sour cream
- 1 cup heavy cream, chilled
- 3 tablespoons confectioners’ sugar
- 1 teaspoon pure vanilla extract
- 8 sliced lemon rounds (from 1 to 2 lemons)
Preparation
Make the crust
1.In a food processor fitted with the blade attachment, process the graham crackers and salt until the crackers are finely ground, about 30 seconds. Add the melted butter and process until incorporated, scraping the bowl halfway with a rubber spatula if needed.
2.Pour the crumb mixture into a 9-inch springform pan. Use a flat-bottomed measuring cup to firmly press the crust in an even layer on the bottom and halfway up the sides of the pan. Transfer the crust to the freezer to firm while you make the filling, at least 10 minutes.
Make the filling
1.In the bowl of a stand mixer fitted with the whip attachment, whisk the heavy cream on medium-high speed to medium peaks, 2 to 2½ minutes. Scrape the whipped cream into a separate bowl and set aside in the refrigerator.
2.To the same stand mixer bowl (no need to clean it), combine the granulated sugar and lemon zest. Rub the lemon zest into the sugar to release the oils from the zest until fragrant.
3.Add the cream cheese and salt and whip on medium speed, scraping the bowl with a rubber spatula, until smooth, fluffy and the sugar is dissolved, 1½ to 2 minutes.
4.Add the lemon juice and vanilla extract and whip on medium speed until incorporated and the mixture has become fluffy again,15 to 30 seconds.
5.Remove the bowl from the stand mixer and, using a rubber spatula, fold the sour cream and reserved whipped cream to the cream cheese mixture until fully combined. Scrape the filling into the prepared crust and smooth with an offset spatula (the pan will be full almost to the top).
6.Chill the cheesecake uncovered in the refrigerator until fully set, 6 to 8 hours, but ideally overnight.
Finish the cheesecake
1.When ready to serve, make the whipped cream: In the bowl of a stand mixer fitted with the whip attachment, whip the heavy cream, confectioners’ sugar and vanilla on medium high speed to medium peaks, 1½ to 2 minutes.
2.Remove the cheesecake from the refrigerator. To release the cheesecake from the pan, run an offset spatula or thin knife around the cheesecake and between the pan to loosen it, then lift up the ring of the pan and set aside. You can smooth the sides of the cheesecake with a small offset, if needed.
3.If desired, use a piping bag fitted with a 1/2-inch star tip to pipe the whipped cream around the top edge of the cheesecake. Garnish with lemon rounds and serve. Alternatively, pile the whipped cream on top of the cheesecake or serve a dollop on the side with each slice.
