Chef notes
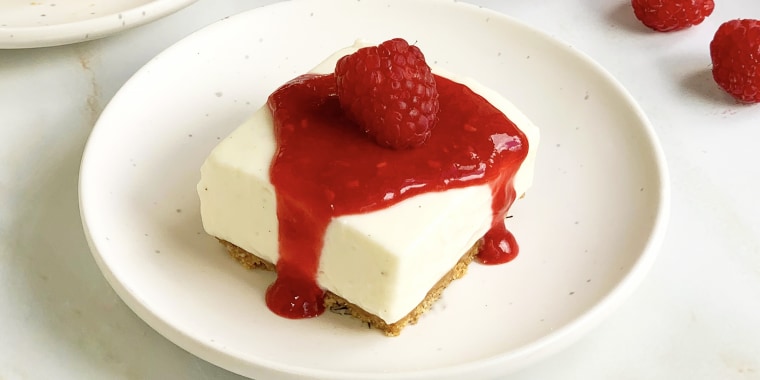
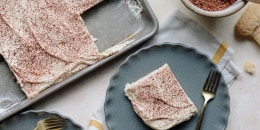
Cheesecake bars are made even simpler in my no-bake version of this classic dessert. Perfect for entertaining and serving a crowd, but delicious enough to dig into the whole pan all by yourself, these bars consist of a buttery graham cracker crust, vanilla bean-flecked filling and fresh raspberry sauce.To make things even sweeter (and easier), both the cheesecake and sauce can be made the night before serving.
The no-bake crust for these bars relies on butter to keep the graham cracker crumbs together, yielding a super tender crust that’s still sturdy enough to yield a hand-held dessert (because who can bother with a fork?). The filling is simple, but employs a few tricks to ensure the bars are light and lofty with just enough heft to be sliced into perfect little squares. To make it extra special, I use vanilla bean paste to flavor the filling, which leaves the most gorgeous flecks of vanilla bean throughout. A splash of lemon juice and a bit of sour cream brings out the cream cheese’s characteristic tang. Finally, a thoughtful ratio of sugar and heavy cream creates the most luxurious, creamy texture that will make you forget all about its fussy baked counterpart.
And although these bars are scrumptious on their own, a super simple sauce made from fresh raspberries makes these bars even more delicious. Simply mash raspberries with sugar, salt, and water, bring it to a boil, thicken it with a cornstarch slurry and flavor it with more vanilla to round it out and a splash of lemon for brightness. Whether you serve it alongside the bars or drizzle it on top, you can’t go wrong!
Technique Tip: Straining the raspberry sauce is optional. I like to strain about half of the mixture and leave some seeds for texture. Moreover, if you find the sauce to not be thin enough once cooled, you can thin it with water (or more lemon juice if you like some tang), about 1/2 teaspoon at a time.
Swap Option: If opting for store-bought graham cracker crumbs, you will need about 2¾ cups for the crust. You can swap the vanilla bean paste in the cheesecake and raspberry sauce for an equal amount of vanilla extract.
Ingredients
- nonstick cooking spray, for greasing the pan
- 22 graham cracker sheets (about 12½ ounces)
- 3/4 teaspoon kosher salt
- 10 tablespoons unsalted butter, melted
- 1 cup heavy cream, chilled
- 2 pounds cream cheese, at room temperature
- 2¼ cups granulated sugar
- 4 teaspoons vanilla bean paste
- 1/2 teaspoon kosher salt
- 2 tablespoons lemon juice (from 1 medium lemon)
- 1/3 cup sour cream
- 12 ounces fresh raspberries, plus more for garnish as desired
- 1/3 cup granulated sugar
- 2 tablespoons plus 2 teaspoons water
- 1/8 teaspoon kosher salt
- 2 teaspoons cornstarch
- 1/4 teaspoon vanilla bean paste
- 1/2 teaspoon lemon juice, plus more as needed
Preparation
Make the crust
1.Lightly spray a 9-by-13-inch baking pan with nonstick cooking spray. Line the pan with parchment, leaving a slight overhang on all sides. If using two sheets of parchment, lightly spray between the layers so it doesn’t slide around.
2.In a food processor fitted with the blade attachment, process the graham crackers and salt until the crackers are finely ground, about 30 seconds. Add the melted butter and process until evenly moistened, scraping the bowl halfway with a rubber spatula if needed, about 15 seconds.
3.Pour the crumb mixture into the prepared pan. Use a flat-bottomed measuring cup to firmly press the crust in an even layer. Transfer the crust to the freezer while you make the filling, at least 10 minutes.
Make the filling
1.In the bowl of a stand mixer fitted with the whip attachment, whip the heavy cream on medium-high speed to medium-stiff peaks, 2 to 2½ minutes. Scrape the whipped cream into a separate bowl and set aside in the refrigerator.
2.In the same stand mixer bowl (no need to clean it), combine the cream cheese, sugar, vanilla bean paste and salt. Whip on medium speed, scraping the bowl with a rubber spatula halfway, until smooth, fluffy and the sugar is dissolved, 1½ to 2 minutes. Add the lemon juice and mix until just incorporated.
3.Remove the bowl from the stand mixer and use a rubber spatula to fold the sour cream and reserved whipped cream into the cream cheese mixture until combined. Scrape the filling into the prepared crust and smooth with an offset spatula, rubber spatula or back of a spoon.
4.Wrap the pan tightly in plastic wrap, taking care to not let the plastic wrap touch the surface of the smoothed cheesecake filling. Chill the cheesecake in the refrigerator until fully set, 6 to 8 hours, but ideally overnight.
5.When ready to serve, lift the cheesecake out by the two long ends of parchment and transfer to a cutting board. Slice the bars, wiping the knife clean between cuts, into 24 pieces.
6.Serve with raspberry sauce and fresh raspberries, if desired.
Make the raspberry sauce
1.While the cheesecake sets, make the raspberry sauce: in a medium saucepan, combine the raspberries, sugar, 2 tablespoons water and salt. Crush the raspberries with the back of a fork until mashed and no big chunks remain.
2.Bring the raspberry mixture to a gentle boil over medium heat, stirring occasionally, about 4 to 5 minutes.
3.Meanwhile, stir the cornstarch and remaining 2 teaspoons water together in a small bowl to create a slurry. Add the slurry to the raspberries and stir to combine.
4.Bring the mixture back to a gentle boil and continue to cook, stirring constantly, for an additional 1 to 2 minutes to cook off the cornstarch and until the raspberry sauce just clings to the back of a spoon. It will continue to thicken as it cools.
5.Remove the sauce from the heat. If desired, strain the sauce through a fine mesh sieve. Stir in the vanilla bean paste and lemon juice. Taste and adjust with more lemon juice as needed.
6.Transfer the sauce to an airtight container, cool to room temperature, then chill until ready to use.
