Medicine is movement. As a sports medicine physician, I want my patients to move every day of the year. Multiple studies have shown that people who move daily are healthier, happier and live longer lives. When it comes to aching body parts, pain often slows people down, which makes them less active.
From my perspective, I don’t want aches and pains to keep my patients on the sideline and away from their field of choice. My goal with the following exercises is to teach people how to manage aches and pains at home and also when to seek help from a doctor or physical therapist.
Here, I'm tackling three problem areas: the back, shoulders and hips. The information below comes from my first book, The Athlete’s Book of Home Remedies. I hope you find this information helpful as you become more active this year.
Lower-back pain/spasms
Muscular back pain usually comes on instantly. Pain radiates from both sides of the spine and the muscles feel as though they’re locked up. It can be severe and debilitating.
Muscular back pain is the most common type of back pain. So what brings on the pain? In general, the paraspinous muscles are too tight, too weak or both. A sudden twisting or wrenching, bending forward, and even a direct impact on the muscle can set it off. Also, discogenic back pain — from a herniated disk — can cause nerves to fire to lockup the muscles.
Here are exercises that can help to prevent back pain by strengthening your back muscles:
1. Plank
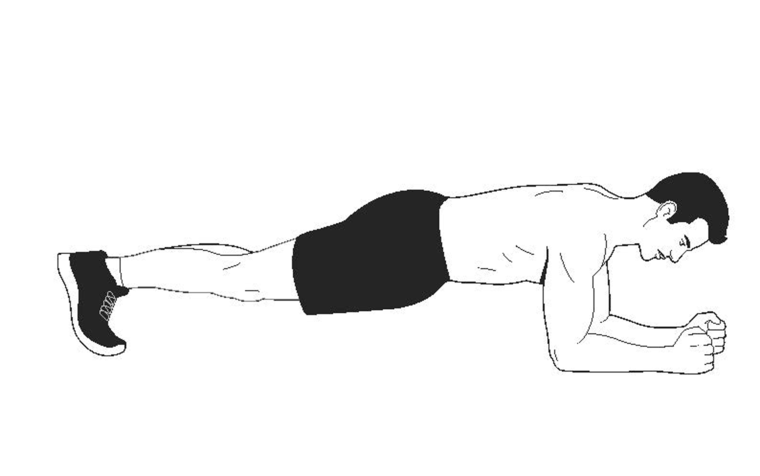
Get into pushup position, but bend your elbows and rest your weight on your forearms. Your body should form a straight line from your shoulders to your ankles. Brace your core and hold. Let your fitness level determine how long you hold the plank, but 30 seconds to a minute is good, while I recommend 3 to 6 minutes total plank time.
2. Hip raise
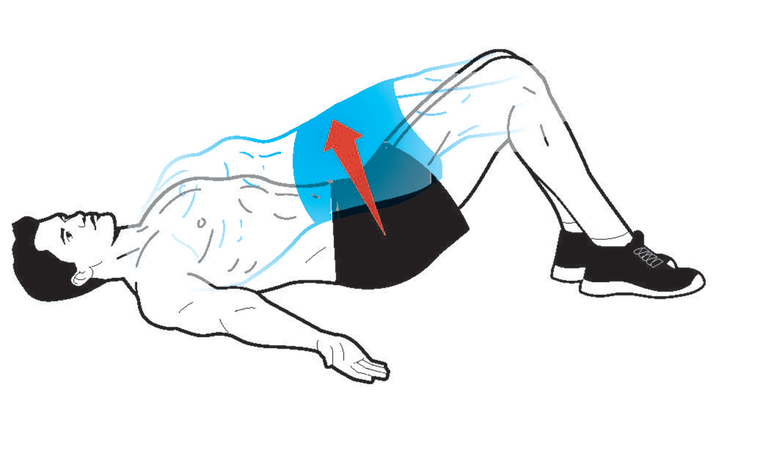
Lie face up on the floor with your knees bent and your feet flat on the floor. Place your arms out to your sides at 45-degree angles, your palms facing up. Raise your hips so your body forms a straight line from your shoulders to your knees. Squeeze your glutes as you raise your hips. Make sure you’re pushing with your heels. To make it easier, you can position your feet so that your toes rise off the floor. Pause for 5 seconds in the up position, then lower your body back to the starting position.
Shoulder impingement
This feels like a pinching sensation, pain and possible weakness when you lift your arms above your head. Impingement happens when the arm lifts and a bone in the shoulder called the acromion impinges — digs into or pinches — the rotator cuff tendons and/or the subacromial bursa, causing pain.
This can happen for many reasons: weakness in the rotator cuff and scapular (shoulder blade) stabilizing muscles; an injury to the tendon attaching the rotator cuff to the humerus, especially when there is tendinitis; poor athletic mechanics; and a shoulder shape that predisposes you to injury. Baseball, tennis, weight lifting, swimming, volleyball, and even competitive sailing put you at risk.
Here are a few exercise that can help with shoulder pain:
3. Sleeper stretch

Lie on the floor on your left side with your left upper arm on the floor and your elbow bent 90 degrees. Adjust your torso so that your right shoulder is slightly behind your left, not directly over it. Your fingers on your left hand should point toward the ceiling. Gently push your left hand toward the floor until you feel a comfortable stretch in the back of your left shoulder. Hold for 30 seconds, then roll over and repeat the stretch for your right shoulder. Perform two to three times a day to improve flexibility, or three times a week to maintain flexibility.
4. YTI raises
Y raise:
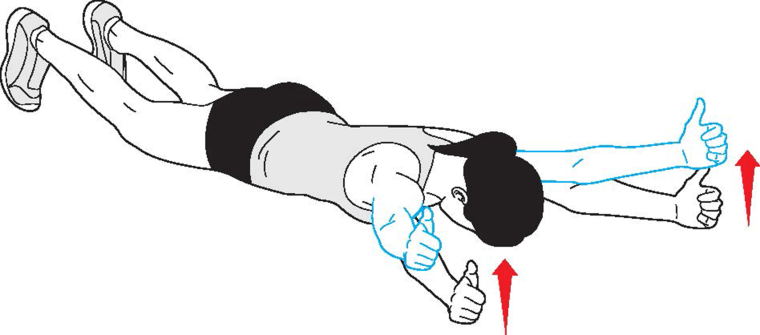
Lie face down on the floor. Allow your arms to rest on the floor, completely straight and at a 30-degree angle to your body, your palms facing each other (thumbs up). Your body should resemble the letter Y. Raise your arms as high as you can, pause, then slowly lower back to the starting position.
T raise:
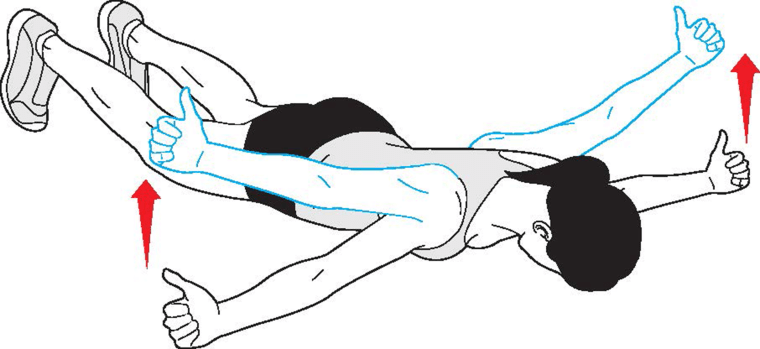
Lie face down on the floor. Move your arms so they’re out to your sides — perpendicular to your body with the thumb sides of your hands pointing up — and raise them as high as you can. Pause, then slowly lower back to the starting position.
I raise:
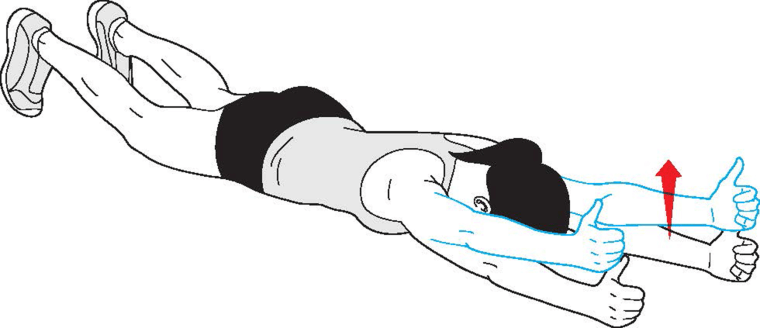
Lie face down on the floor. Position your arms straight above your shoulders so your body forms a straight line from your feet to your fingertips. Your palms should be facing each other, thumbs pointing up. Raise your arms as high as you can, pause, then slowly lower back to the starting position.
Hip pain
Pain in the front of the pelvis on either side, especially when the knees are raised toward the chest for an extended period (as when you pull your knee to your chest to tie your shoe, for example). Lower-back pain and patellar knee pain can also be symptomatic of iliopsoas problems.
The iliopsoas is the combination of the psoas and iliacus muscles (aka the hip flexors), and they are seriously underrated muscles. They don’t get nearly the press that hamstrings, glutes and quads do, but they’re equally as — if not more — important when it comes to everyday movement, as well as explosive athletic movement.
Their role is twofold. First, they help support the spine. They help you bend forward at the waist (which is why a tight iliopsoas can cause lower-back pain). And second, they’re your hip flexors, meaning that they help you draw your knee up to your chest. An injured iliopsoas is very bad news for an athlete. Here are a couple of exercises that can strengthen those muscles and help to alleviate pain:
5. Glute stretch
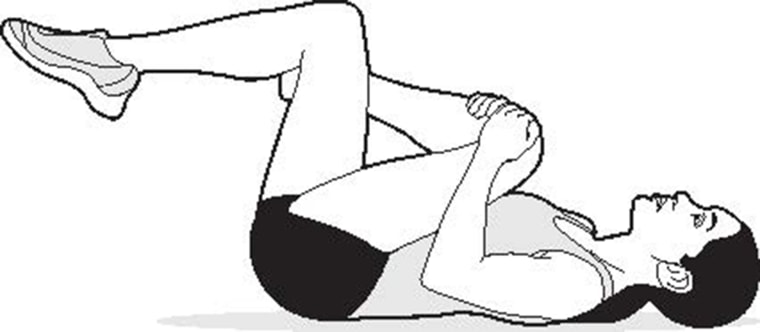
Lie face up on the floor with your knees and hips bent. Cross your left leg over your right so that your left ankle sits across your right thigh. Grab your left knee with both hands and pull it toward the middle of your chest until you feel a comfortable stretch in your glutes. Hold for 30 seconds, then repeat on the opposite side. Repeat twice for a total of three sets — and several times a day if you’re really tight.
6. Reverse back lunge
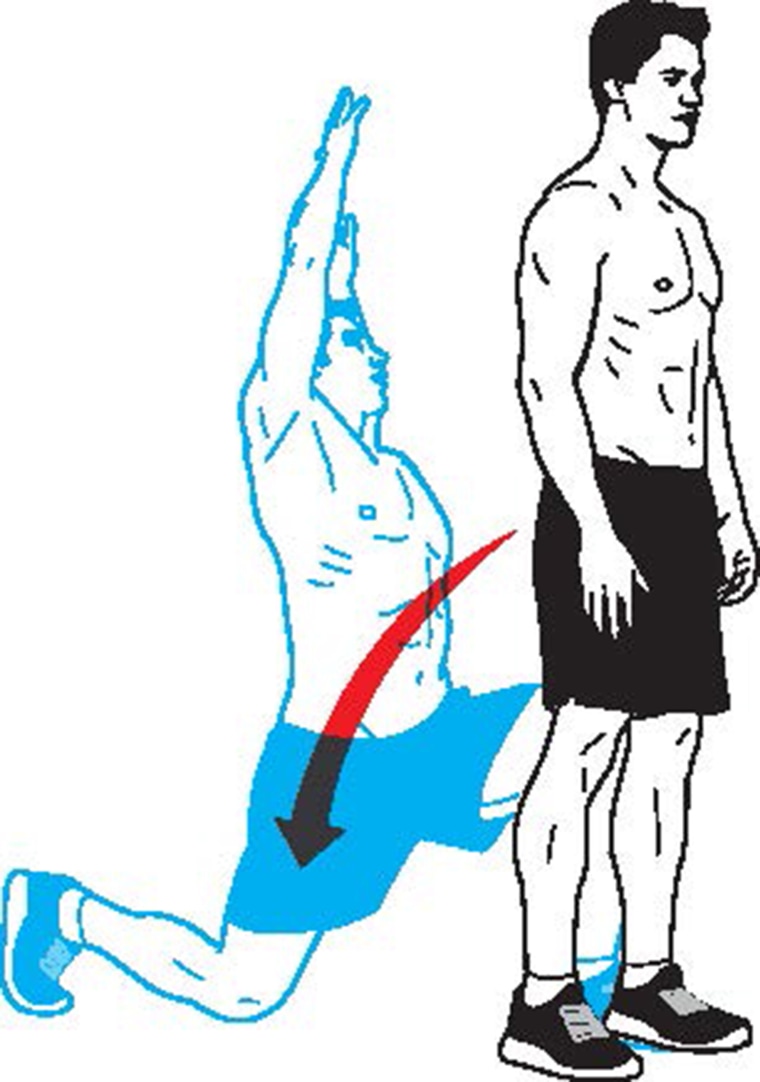
Stand tall with your arms hanging at your side. Brace your core and hold it that way. Lunge back with your right leg, lowering your body until your left knee is bent at least 90 degrees. As you lunge, reach back over your shoulders and to the left. Reverse the movement back to the starting position. Complete the prescribed number of reps with your right leg, then step back with your left leg and reach over your right shoulder for the same number of reps. Keep your torso upright for the entire movement.
Dr. Jordan Metzl is the author of the bestselling titles Running Strong, The Exercise Cure and Athlete's Book of Home Remedies.