Chef notes
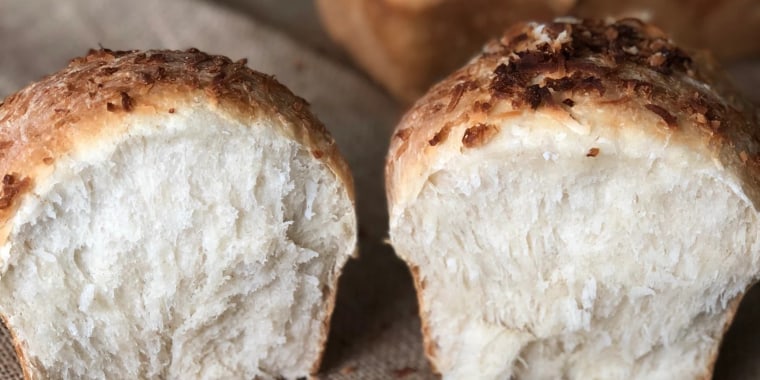
This bread will be soft enough to pull apart when it comes out of the oven so don't miss out on eating it warm. Traditionally not too sweet, this bread is usually served with different soups and beans. In fact, once upon a time, it was not even leavened at all. My version, however, is different in both of those regards, as I like to sweeten it up just a tad and also, I enjoy a much fluffier, softer version than what you might traditionally find.
The most significant difference in my version is that I'm using my sourdough starter, which makes this pan de coco naturally leavened, and thus healthier and easily digestible. Most importantly, it's more delicious to eat this way. The process is not too complicated, so make sure you have as much fun as possible when making it!
Technique tip: Remember that this bread is best when eaten hot out of the oven.
Swap options: Canned organic coconut milk works here, and you can use sweetened or unsweetened shredded coconut, depending on your preference.
Ingredients
- 85 grams mature sourdough starter
- 50 grams organic whole-wheat flour
- 150 grams organic bread flour
- 170 grams warm water
- 200 grams organic coconut milk
- 100 grams water
- 200 grams levain (recipe above)
- 225 grams organic all-purpose flour
- 225 grams organic bread flour
- 50 grams shredded coconut, plus more for topping
- 28 grams unsalted butter, softened
- 28 grams sugar
- 10 grams kosher salt
- coconut oil, for basting
Preparation
For the levain build:
Mix all ingredients together and let it sit at room temperature for about 4 hours, or until roughly doubled in size.
For the final mix:
1.Warm the coconut milk and the water slightly, on the stovetop (or in the microwave). Just make sure it isn't boiling or too hot. Combine into a bowl.
2.Add the levain and dissolve into the warm coconut and water mixture. Use your hands to mix in all other ingredients (except coconut oil) until incorporated. Turn it out onto the countertop and knead with your palm until it is smooth. Alternatively, you can mix it well and just let it be or use a stand mixer with the paddle attachment. Either way is fine — just make sure you aren't overworking the dough.
3.Let this mixture ferment in the bowl for 5 or 6 hours. You don't need to stretch and fold this dough; you just need to look for an increase in volume and a nice, smooth surface. If you don't want to bake on the same day, you can put the bowl in the fridge and let it continue to ferment in a cold environment for up to 12 hours and then move on to the next step.
4.After you're done with your initial fermentation, it's time to shape and proof. Flour your work surface and dump out your dough.
5.Divide into three pieces. Roll each piece into a log and place each log horizontally in a greased baking tin. You can grease your tin with coconut oil or butter. Let this proof for about 3-4 hours.
6.30 minutes before the proof is complete, preheat your oven to 375 degrees.
7.Once the loaf is done proofing, baste with coconut oil and top with a liberal amount of shredded coconut.
8.Bake for 40 minutes, or until golden brown. You may need to rotate your pan halfway through the bake.


