Chef notes
If you’re a cheesecake lover, but have always been a bit intimidated by, or nervous about, the process of making one, we get you! Water baths, long bake times and the fear of a cracked top are indeed scary. But what if we told you that you could satisfy all your cheesecake longings with a no-bake one that is assembled in mere minutes (sans eggs, thank you very much). Oh and did we mention that it gives you all the tangy, rich, creaminess of its baked brethren with about 1/4 of the work and no stress or anxiety whatsoever? You’d think we were pulling your leg, but we’re not! A no-bake cheesecake is easy-peasy to assemble, gorgeous to behold and delicious to eat.
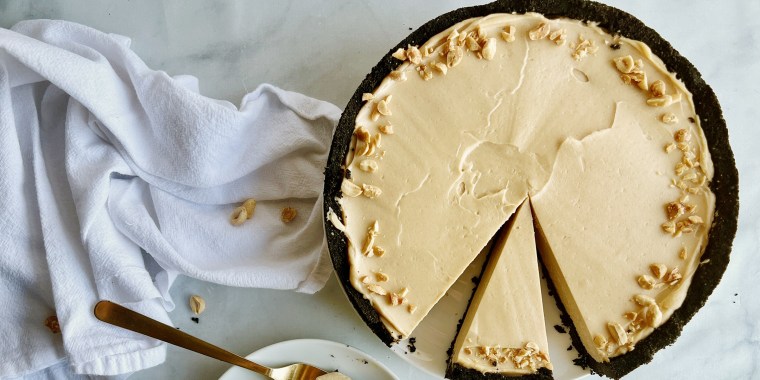
First, make an easy chocolate cookie crust and press it into the bottom of a springform pan — we like to line both the bottom and sides of the pan for easy release. The filling is assembled in a stand mixer or with a hand mixer and consists of nothing more than cream cheese, peanut butter, sugar, heavy cream, vanilla and salt. The combination of tangy cream cheese and the sweet and salty peanut butter is just too good to be true. The texture of the filling is dense. And the combination of it, plus the crispy cookie base and the sprinkling of crunch salty peanuts around the cake’s perimeter, is fantastic (you’re welcome). No one will believe that this beauty was”baked” in the refrigerator — and we won’t tell if you don’t. If you have a little extra filling leftover after transferring it to the crust, place it in a ramekin and chill it briefly before enjoying — it’s the perk of being the chef and you deserve it.
Technique Tip: Do not overbeat the cream cheese or your cake will lose structure. When measuring out the peanut butter, spray the measuring cup with cooking spray so that the peanut butter releases easily from it. Sprinkle the peanuts only on the outside edge of the cake for the most elegant presentation.
Swap Option: Instead of sprinkling nuts on the top of your cake, consider dusting the top with cocoa powder, or melting a little chocolate and drizzling it on top decoratively.
Ingredients
- 9 ounces (about 2 cups) crispy chocolate cookies, such as Nabisco or Goya chocolate wafers, finely ground, about 2 cups
- 3 tablespoons granulated sugar
- 1/2 teaspoon kosher salt
- 7 tablespoons unsalted butter, melted
- 24 ounces cream cheese, room temperature
- 1 cup confectioners’ sugar
- 1½ cups creamy peanut butter, such as Skippy
- 1 tablespoon pure vanilla extract
- 3/4 teaspoon kosher salt, or more to taste
- 1 cup heavy cream
- chopped salted, roasted peanuts, for decorating
Preparation
1.Grease a 9-inch springform pan with cooking spray or softened butter. Line the bottom and sides with parchment paper.
2.In a medium bowl, combine the cookie , sugar and salt. Stir in the melted butter. Scrape the crust mixture into the prepared pan and firmly press it into the bottom and about 2-inches up the sides, using your fingers or the bottom of a metal measuring cup. Place the crust in the freezer while you make the filling.
3.In the bowl of a stand mixer fitted with the paddle attachment, beat the cream cheese on medium-low just until smooth, scraping the bowl with a flexible spatula as needed.
4.Add in the sugar and mix until just combined. Add the peanut butter, vanilla and salt and beat until combined. Pour in the heavy cream and beat until smooth, but do not overmix or the cream cheese will lose structure.
5.Scrape the filling into the prepared crust until it just fills the sides of the crust, smoothing the top with an offset spatula. Cover the cake with plastic wrap and refrigerate it for at least 5 hours and up to overnight.
6.When ready to serve, remove the sides of the pan and, if you would like to remove the base (though you don’t have to), slide a long, serrated knife between the crust and the parchment paper. Wipe your knife with hot water between slices for clean cuts.
7.Serve slices with a sprinkle of peanuts. The cake will keep tightly wrapped in the refrigerator for up to 3 days.
