Chef notes
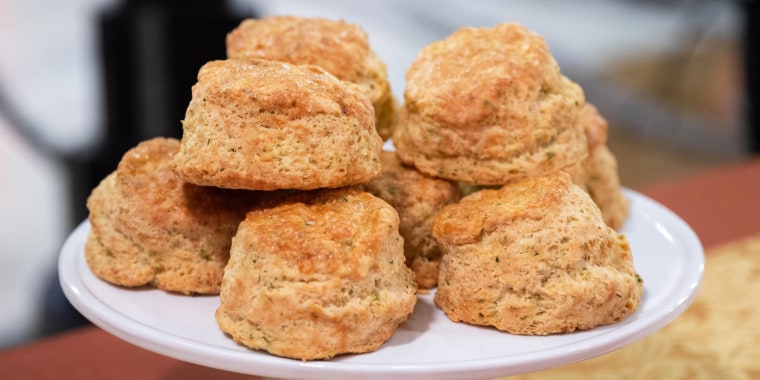
These biscuits are the business! The secret is the cream cheese. It helps the biscuits retain their moisture and bake up a crunchy exterior and a soft, melt-in-your-mouth interior. Billowy biscuits are my favorite for both sweet and savory dishes, but sometimes I want biscuits with a savoriness that also offers a more aromatic experience. Adding chives and goat cheese to the biscuits does just that while retaining the crunchy exterior and light airy interior.
Technique tip: If you have a convection option for your oven, I recommend using it. The fan circulating the air inside the oven allows the biscuits to brown more easily and rise high. Note that baking time for convection oven baking is nearly double the time of a conventional oven, as the oven is set to a lower temperature.
Ingredients
- 4 cups unbleached all-purpose flour, plus more for rolling
- 1/2 cup finely chopped fresh chives
- 2 tablespoons baking powder
- 2 teaspoons kosher salt
- 1 teaspoon baking soda
- 24 tablespoons (3 sticks) very cold unsalted butter, cut into 1/2-inch pieces
- 4 ounces very cold cream cheese, cut into 2-inch pieces
- 4 ounces goat cheese
- 1½ cups buttermilk, plus more as needed
- 1 large egg
Preparation
1.Adjust as oven rack to the middle position and preheat the oven to 400 F. If your oven has a convection option, preheat to 325 F. Line a baking sheet with parchment paper.
2.In a large bowl, whisk together the flour, chives, baking powder, salt and baking soda. Add the butter, cream cheese and goat cheese. Use a pastry cutter, a fork or your fingers to cut the butter and cheese into the flour until the pieces are no bigger than a pea.
3.Pour in the buttermilk and, using your hands, combine the flour and buttermilk until the mixture is no longer dry. With the dough still into the bowl, turn and fold the dough over onto itself until the dough is sticky and the flour is fully incorporated with the dough. If the dough is too dry or if there is a bit of flour in the bottom of the bowl that won't mix with the dough, add 1/2 tablespoon of buttermilk to the bottom of the bowl to help the flour get incorporated.
4.Generously flour your work surface with 1 to 2 tablespoons of flour. Place the biscuit dough on the work surface and, using your hands, knead the dough together while pinching any tears or lines in the dough. Add another dash of flour if your work surface becomes sticky.
5.Flour a rolling pin and your hands. Set a small bowl of flour near your work surface. Roll out the dough until it is 1 inch thick. Using a 3-inch round biscuit cutter (or a similar size of overturned drinking glass), dip the biscuit cutter in the flour between the cuts and cutting biscuits as close together as possible to minimize the number of scraps.
6.Collect the scraps and knead them together, then press 1-inch thick and cut a few more biscuits (discard any remaining scraps). Transfer the biscuits to the prepared baking sheet.
7.In a small bowl, whisk together the egg and 1 tablespoon water. Using a pastry brush, apply egg wash onto the tops of the biscuits.
8.In a conventional oven at 400 F: Bake the biscuits for 20 minutes. Reduce the oven temperature to 350 F and continue baking until the center of the biscuit is set, 10 to 12 minutes. In a convection oven at 325 F: Bake without reducing the oven temperature until golden brown, about 1 hour.
9.Store in an airtight container or zip-top bag at room temperature for up to 4 days.
