Welcome to Start TODAY. Sign up for our free Start TODAY newsletter to receive daily inspiration sent to your inbox.
The glutes are a commonly targeted area, but go-to exercises often neglect the gluteus medius. They’re much smaller than the maximus, but strengthening this muscle is critical to construct a well-rounded backside, a sturdy core and strong glutes.
The fire hydrant exercise specifically targets the glutes, outer hip, low back and core to improve stability and strength in the body. Whether you suffer from low back pain and want to strengthen your entire core (not just your abs!), you want to build a well-rounded booty, or are looking for cross-training exercises to support your walking or running routine, the fire hydrant exercise can help.
What are the benefits of the fire hydrant exercise?
Fire hydrants target the gluteus medius and outer hip. “Dead butt syndrome,” also called gluteus medius tendinosis, occurs when the gluteus medius (one of the three main muscles in the buttock) weakens due to sitting all day.
Located right below the hipbone in the upper corners of your glutes, the gluteus medius is inactive unless lateral movements are incorporated into your routine. Even seasoned fitness enthusiasts may forget to work these muscles because they require a combination of compound and isolation movements to hit properly. Luckily, fire hydrants are a great gluteus medius isolation exercise that works the core and hip abductors, too!
Another bonus: they do this without any equipment! The isolation exercise can tighten and tone the glutes and core using just your bodweight, preparing you for more advanced exercises and improving your overall fitness level.
This isolation exercise is sure to give you a great burn while opening up the hips, improving posture and strengthening your upper body. Fire hydrants can also be used as a pre-workout activation exercise, to wake up the glutes and help you get more out of exercises like squats. This bodyweight exercise requires some coordination and core stabilization to perform, which helps improve balance.
The common mistakes people make when doing fire hydrants
Since the exercise requires you to balance on just three limbs, it is challenging. So it’s important to be aware of common mistakes and check your form.
Fire hydrants are performed on all fours. Many people are unsure of how far apart to place their hands and knees. Follow this simple rule: place hands directly under your shoulders and knees directly under your hips. Hands will be shoulder-width apart and knees will be hip-width apart.
Stabilizing your core is key and will make the exercise much more effective. Tightening your core takes the momentum out of the movement and also promotes proper alignment. Without core engagement, your lower back will dip toward the ground. This can cause pain in the low back. So make sure that you pull your naval in toward your spine at all times. This will help protect your back while preventing momentum from overriding glute muscle engagement.
Here are a few other common mistakes and how to combat them:
- Arching the spine. This stresses your back muscles and can lead to injury. Keep your core engaged by pulling your belly button toward your spine and maintaining a straight line from your head to your tail bone. Squeeze the glute, not the low back, throughout the whole movement.
- Dropping your head. Be mindful to keep your neck in line with your spine. Try not to look up or down while performing the movement. The neck should be neutral and in line with the spine.
- Kicking your leg up too high. This can also cause your low back to arch. Try squeezing the core to keep equal weight on both hands. Clients have a tendency to overarch the back and dip into the opposite side to raise the leg higher. Height is much less important than control and engagement. Make sure the knee remains at 90 degrees and doesn’t go above hip height at the top of the movement.
- Leaning to the side. When lifting the leg, many of my clients have a tendency to lean the opposite way, placing more weight on the opposite wrist. We don’t want this because it strains the wrist and disrupts balance. Your body will twist slightly when you open your leg out to the side, so try your best to keep the hips in line with one another.
- Twisting the hips. The purpose of the fire hydrant is to work your outer glute and hip muscles, not to tighten the supporting leg muscles. Keep your left and right hips at the same height as much as possible. Some unevenness is inevitable, especially in the beginning, but practice keeping your balance!
How to do a modified fire hydrant exercise
The fire hydrant is a comprehensive movement that requires a lot of core balance, mobility, wrist strength and hip flexibility. Don’t feel bad about starting with the modified version! It is very close to the full movement, with just a slightly smaller range of motion. This will ensure that your low back doesn’t compensate for imbalances and endure excessive pressure. You will still feel the burn and target the right muscles raising your leg half way up!
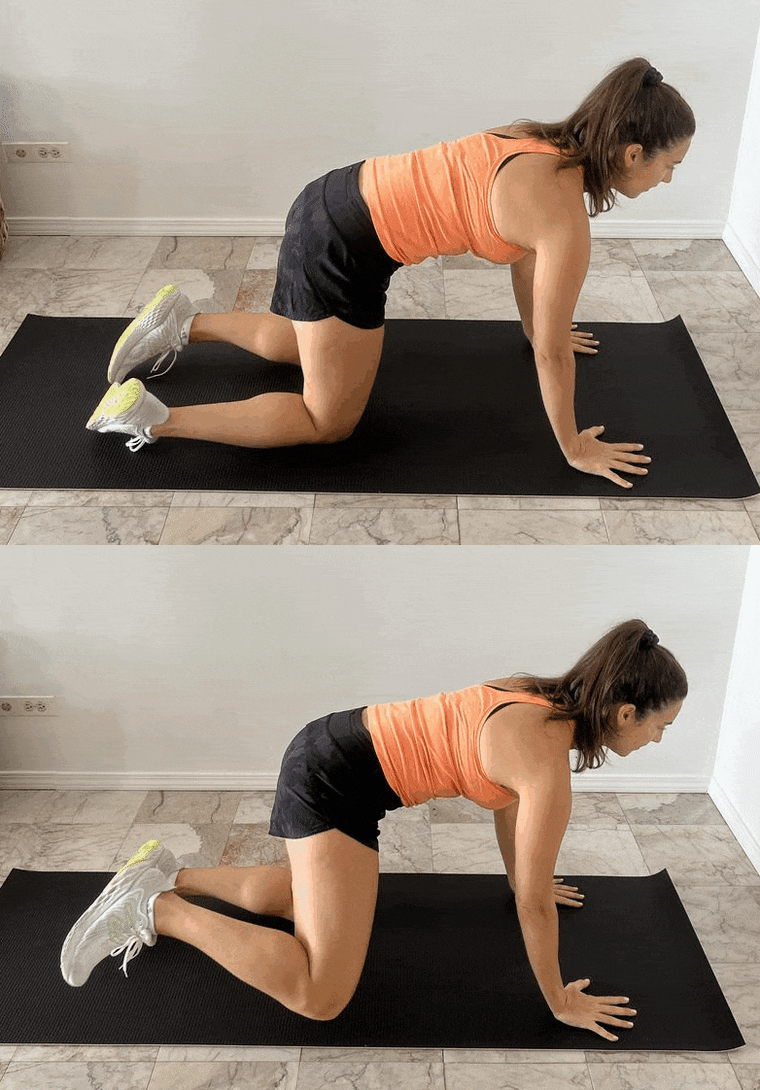
Set up on all fours the same way you would for the regular version. When raising the working leg, only raise it up about half way between the floor and hip height, still keeping your knee bent at 90 degrees. Lower with control and repeat for ten reps on each leg. Also, spread your fingers as wide as possible to increase the surface area on the ground, which will give you more stability.
How to perform the fire hydrant correctly
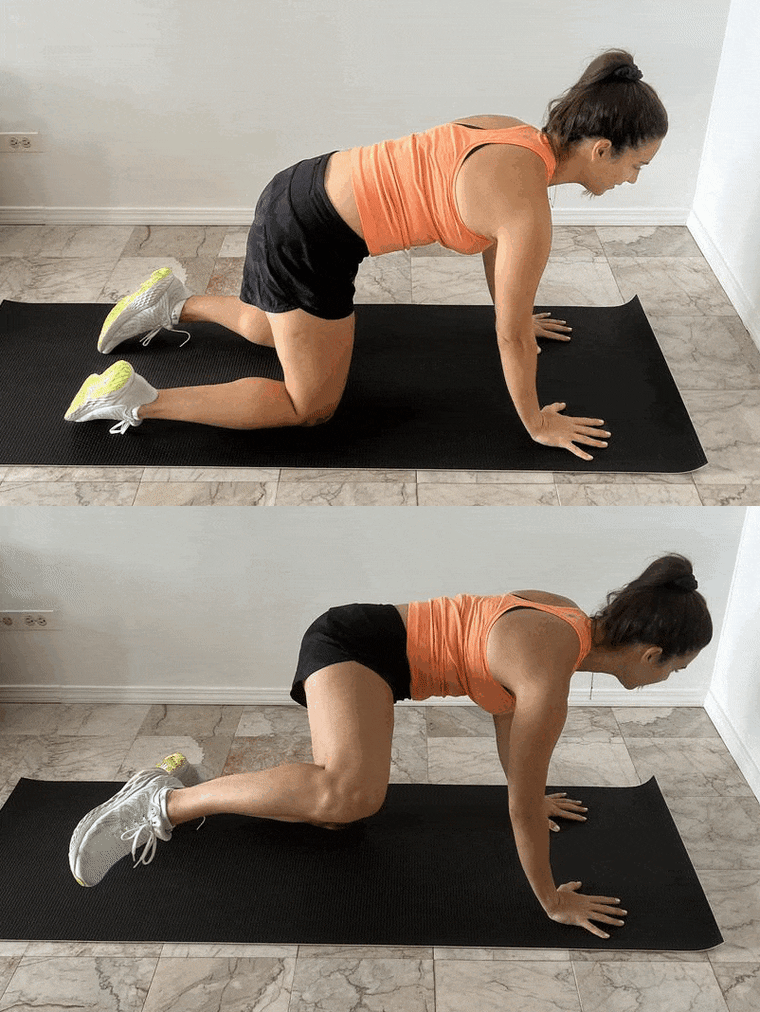
With proper form, this exercise is extremely effective at tightening the outer glute and the core. Master the proper form by following these 5 simple steps:
- Get on all fours with your hands under your shoulders, fingers spread wide, and knees directly below your hips. Press evenly into both hands and maintain this balanced pressure throughout.
- Keeping your back straight, abs tight and knees at 90 degrees, lift your right knee off of the ground slightly.
- Maintaining the bend in your knee, reach the right knee out and up to hip height (or slightly lower for a modification).
- Return back to the starting position. This is one repetition.
- Perform ten reps on the right side then lower the knee to the ground. Adjust to make sure your spine is in alignment and hips are even before lifting the left knee.
- Repeat for ten repetitions on the left side.
4 exercises that will help you perform fire hydrants better
Because this exercise requires coordination, in addition to core stabilization and strength, it may be best to start with some simpler exercises. These moves can strengthen the glutes and surrounding muscles, and make it easier to perform the fire hydrant. If fire hydrants feel too intense, give these moves a try:
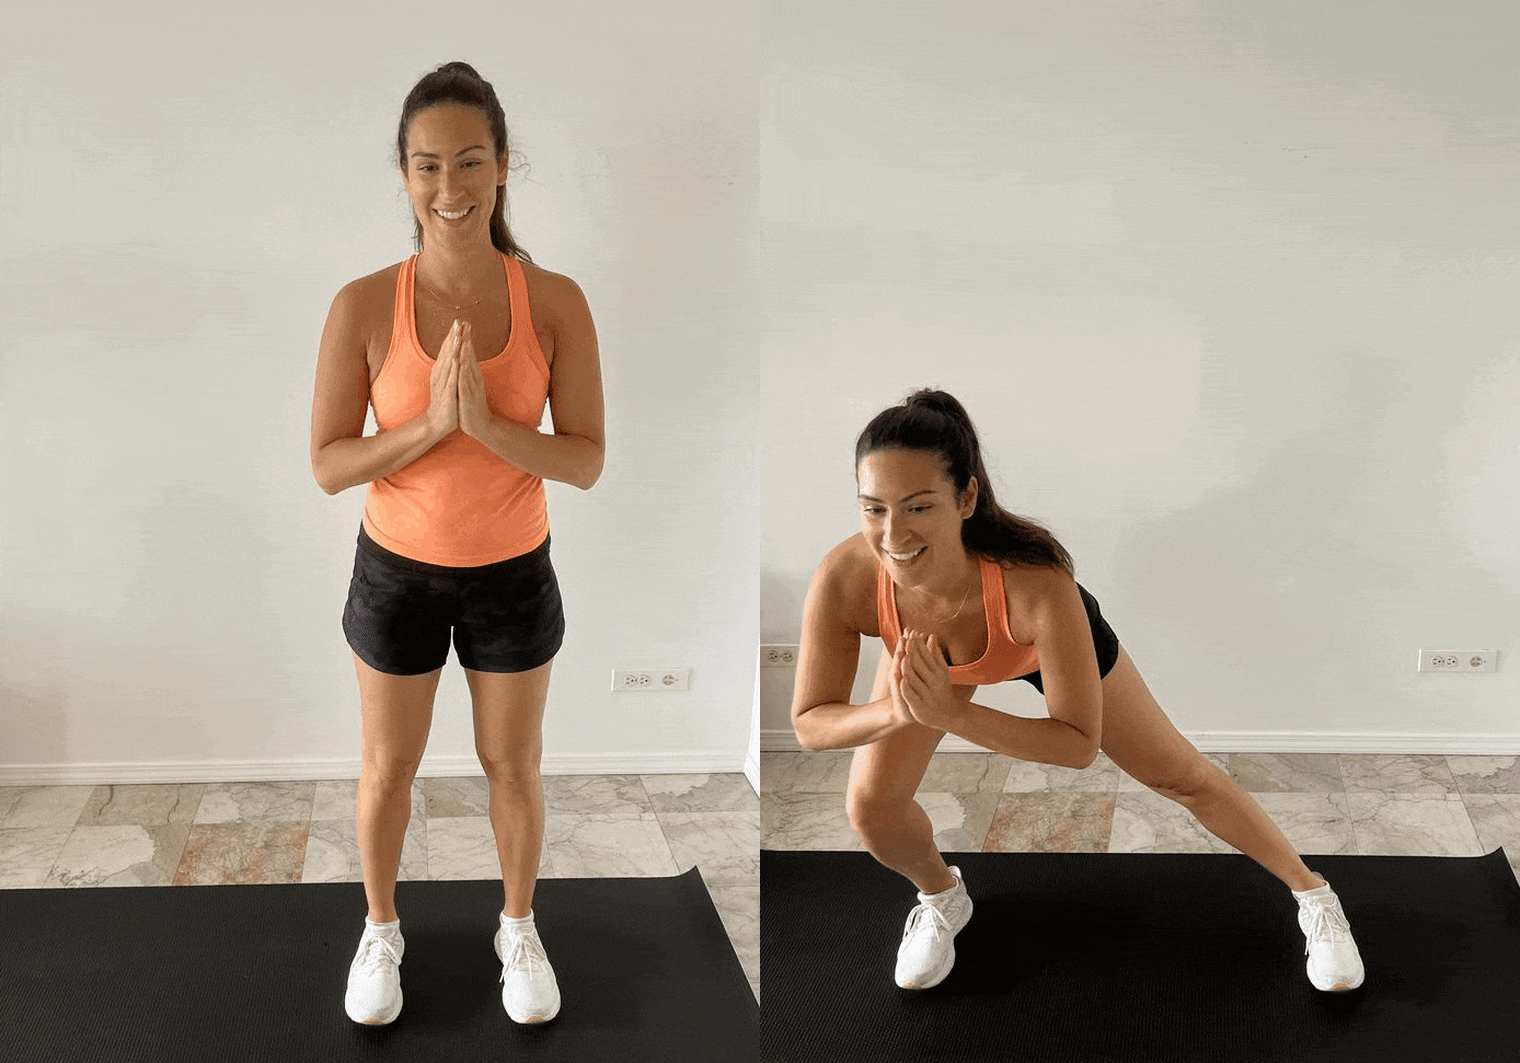
Side lunge
Standing with your feet as wide as your hips, step your right foot out to the right and lunge into the right glute. Reach the right glute backward as you keep the left leg straight. Press down through your right heel as you come back to center. Repeat 10 times and then switch sides.
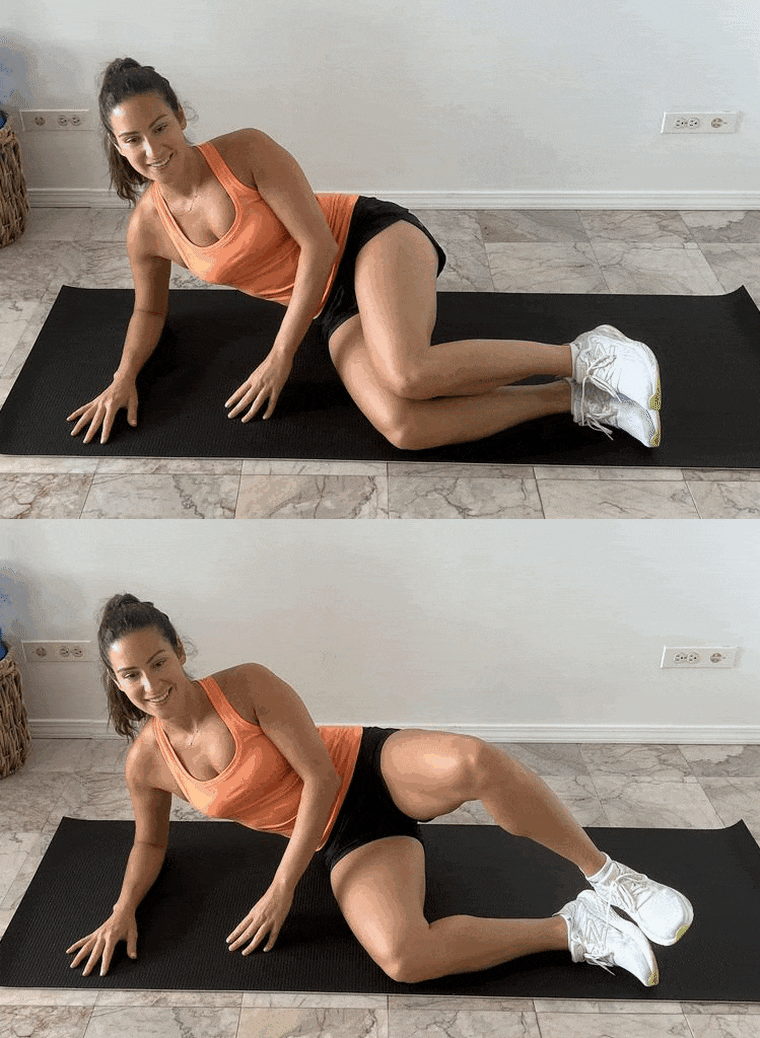
Clam
Lie down on your left side and prop yourself up on your elbow and forearm. Bend both of your knees, bringing them closer to your torso. Keep one leg on the floor while lifting the other into the air, opening your hips. Keep your feet glued together. This should activate your right glute. After ten repetitions, switch to your right side and repeat the same process.
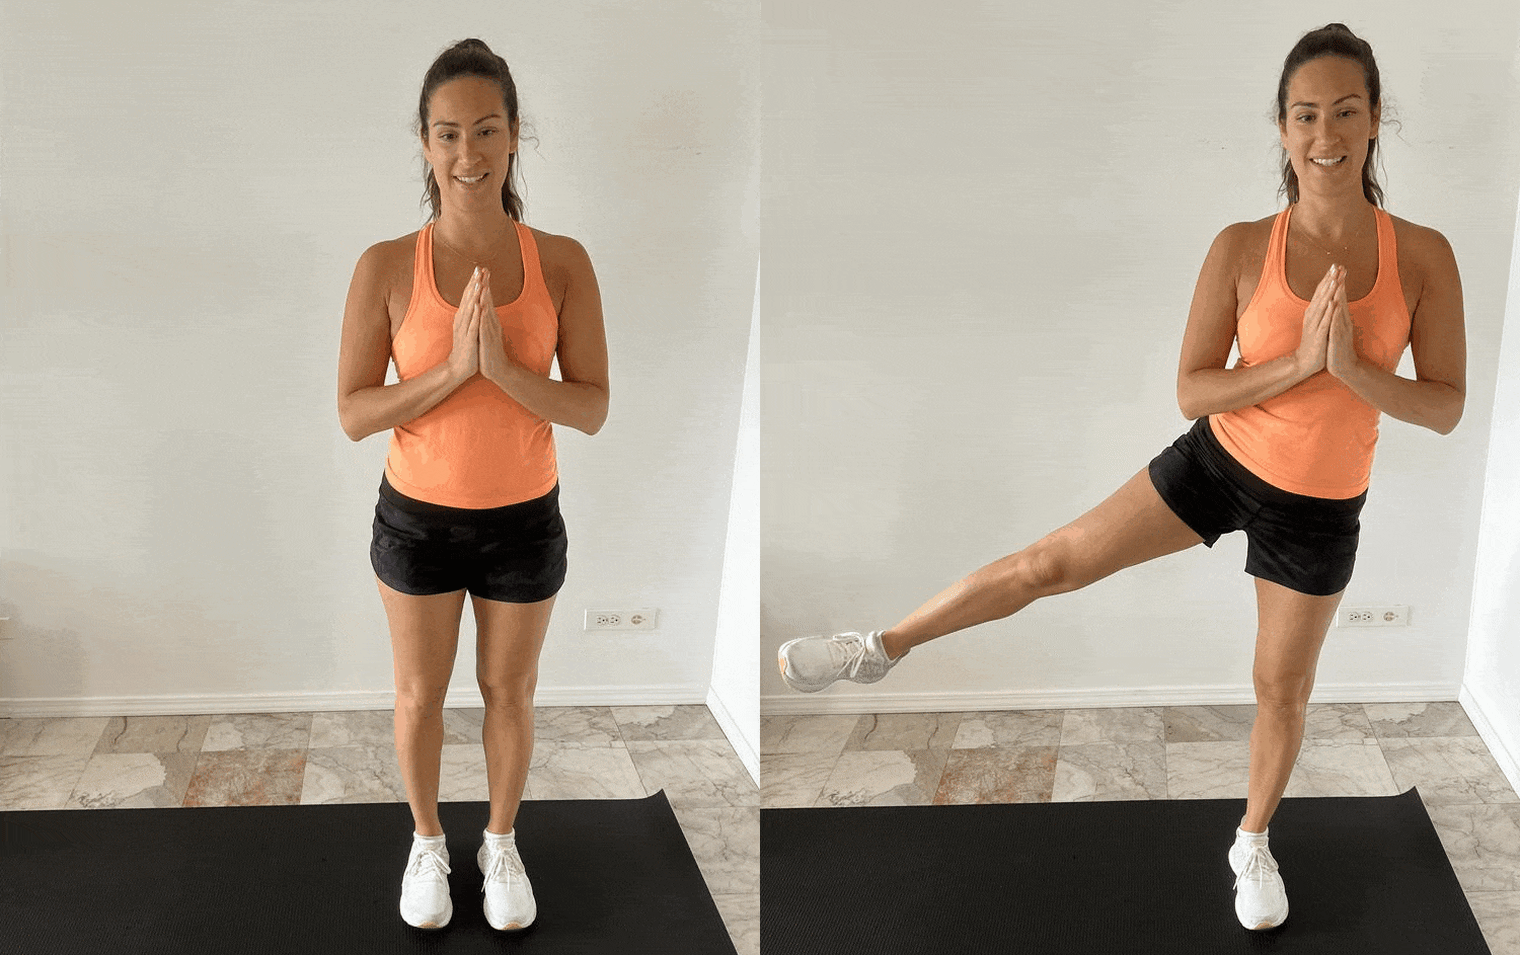
Standing side leg lift
Stand with your feet as wide as your hips. Then lift the right leg out to the right and up as high as the hip (or lower for a modification) to work the outer right hip and thigh. Place the foot back down. Repeat 10 times, then switch to the other side.
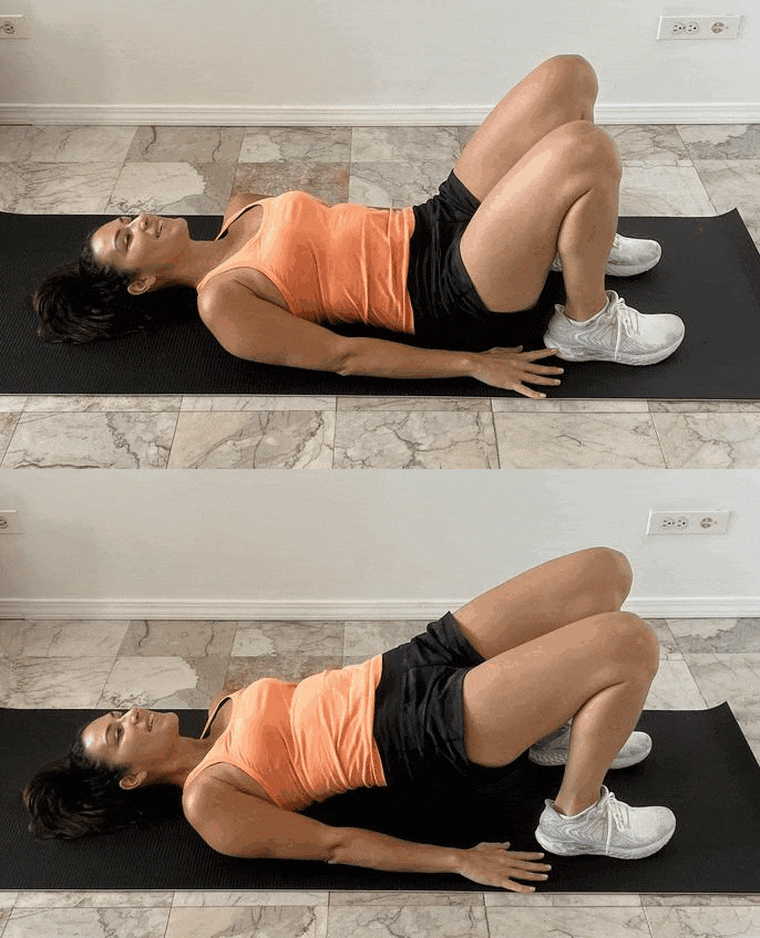
Glute bridge
Lie flat on your back with your knees bent and open as wide as the hips. Raise your hips to create a straight line from your neck to your knees, being careful not to hyperextend your hips. Clasp your hands underneath your back for a deeper stretch or keep the arms extended straight out on the floor, fingers pointing to your feet. Hold the pose for 10 seconds. Don’t let the knees splay out or in. Slowly lower down.
