Welcome to Start TODAY. Sign up for our Start TODAY newsletter to receive daily inspiration sent to your inbox — and join us on Instagram!
Looking for an ultra-efficient exercise that works your entire body at once? The plank is your new best friend. Before you write it off as an advanced exercise you couldn't possibly attempt, hear me out.
The plank is a core exercise that works your abs, but also strengthens the arms, back and lower body, too. Because it's so effective at strengthening the core (and the shoulders and glutes!), it can help reduce back pain. That’s why I recommend everyone include the low-impact exercise in their routine.
Of course, this is easier said than done. The fact that the plank recruits so many muscle groups at once is what makes it one of those exercises that is much harder than it looks. That’s why if you’re new to fitness or still working on strengthening your core, I don’t recommend that you jump right into a full plank. Although it seems simple, it’s easy to perform a plank incorrectly and this not only negates the core-strengthening benefits, but can lead to back pain as well.
Learn the benefits of a plank, how to start with a modified version and bonus exercises that will help you build the strength necessary to work your way up to the full move.
Plank benefits
Planks are commonly thought of as an ab workout, but they are actually a full-body exercise that also recruits the thighs, arms and back. But in order to see the full-body toning benefits, you have to engage all of these muscles, which is something people often overlook. (You likely aren’t focused on tightening your quads and glutes while in a plank position, right?) That's why form is so important. Reaping all of the benefits of a plank — increased balance and posture, improved core strength, reduced belly fat — is dependent on performing it correctly.
Plank form mistakes
Letting the back arch is the most common mistake I see people make when doing a plank. This happens because you aren’t engaging your core properly, which not only defeats the purpose of the exercise, but can lead to injury. To prevent this from happening, tighten your abs by pulling your belly button inward (toward the ceiling) and tilting your pelvis under to reach your tailbone toward your heels. This will ensure you maintain correct form and reduce the risk of back pain and injury.
Another common mistake I see is letting the head drop down toward the floor. This puts strain on the neck and compromises your form. Remember: Your neck is connected to your spine. Try to keep that in mind while in plank position. Keep the top of your head reaching toward the front of the room with your eyes on the floor a couple of inches in front of your hands.
How to plank
A plank may be a static exercise, but getting there (with proper form) is a process.
- Start on your hands and knees on the mat. Line your shoulders up over your wrists, and make sure your wrists are parallel with the front of the mat.
- Walk your knees back a few inches, but make sure that your shoulders stay over your wrists. This means that your hips will not be over your knees anymore; your hips will be further forward, and your knees will be behind your hips.
- Pull your navel in toward your spine as if there is fire on the mat and you’re trying to pull your stomach away from the fire.
- Tuck your toes under and lift your legs up off of the ground. Squeeze your quads and reach your heels toward the back of the room.
- Make sure your shoulders are over your wrists, and that you’re looking a few inches in front of your fingers to keep your head and neck elongated. If you have a mirror, check yourself out to ensure that you’re in one straight line!
How to do a modified plank
If your back starts to arch, this is a sign that you lack the strength required to hold a standard plank. Don’t worry: Plenty of my clients struggle with this! When your muscles fatigue, you start to rely on the back muscles instead of the core to hold you up in the plank position.
To avoid this from happening, I always suggest people start with a modified version and work their way up to a full plank to ensure they develop the core strength necessary to perform the move with proper form.

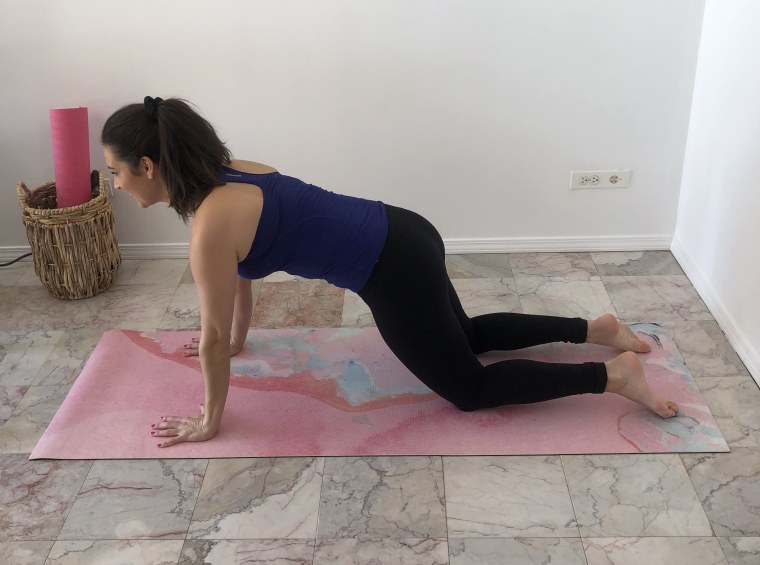
One way to modify a plank is to perform it with your knees bent and resting on the ground. Be sure to still keep your torso straight from your head to your tailbone and continue to pull your belly button inward, tightening the core. Performing a plank on the knees allows you to really focus on your form and build up core strength without the risk of injury.
How long to hold a plank
When you do feel ready to hold a full plank, start slow. Hold a plank for 10 seconds and then break. Perform 3 rounds of a 10-second plank each day. Do this for a few weeks to build strength. Then, steadily work your way up to longer intervals. Try two, 15-second planks, then hold it for a full 30 seconds. Gradually, you can work your way up to 45-second and eventually 60-second planks. But make sure to dial it back if you ever feel your back start to arch.
4 plank exercises to try
These exercises will teach you how to properly engage not only your core, but the entire body, like you need to do when performing a full plank.

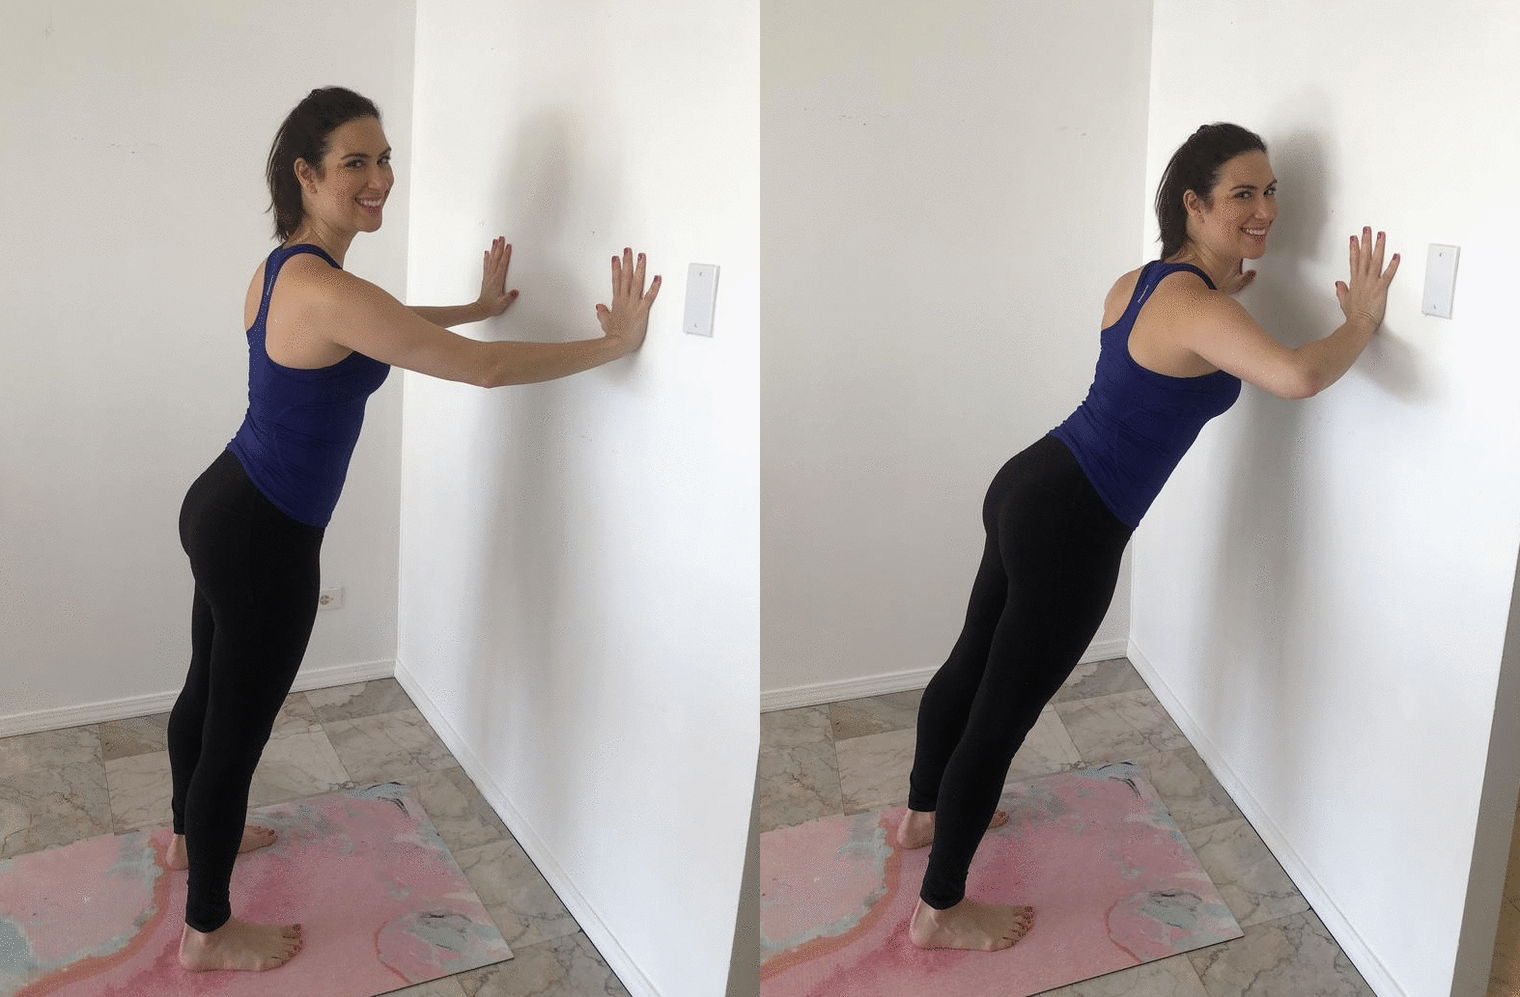
Wall pushups
Place your hands flat on the wall and step your feet back a few steps away from the wall so that your body is at an angle. Perform a pushup. Repeat 10 times. This will get your core warmed up for the next few moves.

Modified plank
Move to a pushup position on your hands and knees and hold. This modified plank position will work your entire core, but in a less intense way, allowing you to really focus on your form. Hold for 10 seconds, then release. Repeat two more times.

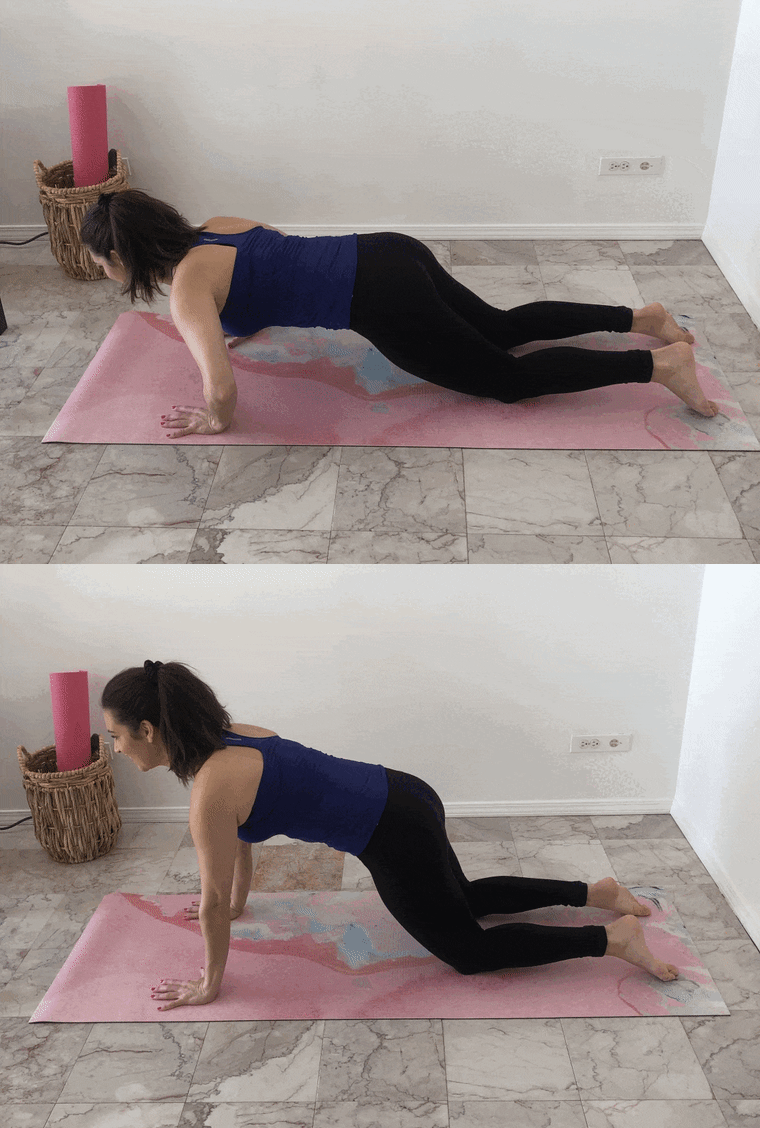
Modified pushups
From this modified plank position, perform 10 pushups by lowering your chest to the ground and then pushing the ground away to return to the starting position. Modified pushups allow you to gradually increase the intensity of the move and challenge your balance — slowly working your way up to the plank.

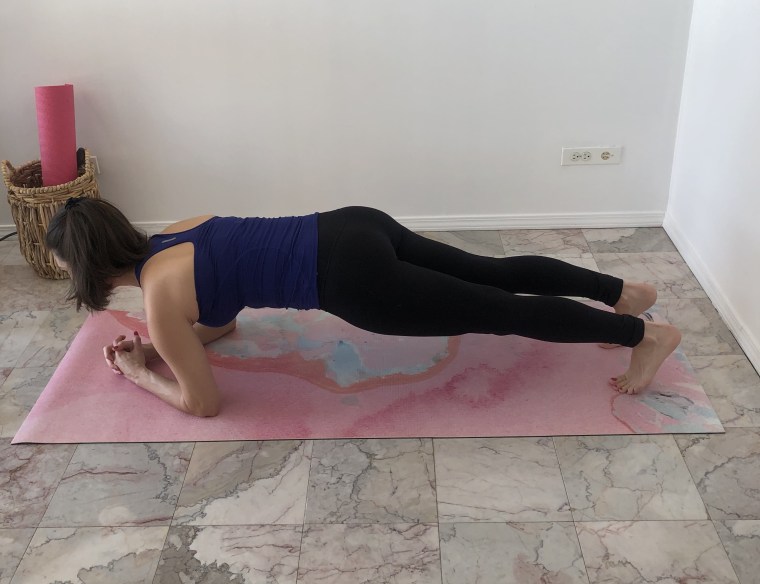
Forearm plank hold
Move from your hands down to your forearms and straighten your legs so that you are now balancing on your toes in a low-plank position. Hold this for 10 seconds, release. Repeat two more times.
Run through this sequence, gradually increasing the time you hold each position until you feel ready to attempt a full plank. When you do, start slow, holding the full plank for just 10 seconds and steadily working your way up to longer intervals.
