When in the midst of a heat wave or bout of humidity, the last thing you want to do is put your time and energy into a hot-tool crafted style only to have it melt as soon as you walk out the door.
Avoid breaking a sweat (and still look great!) with these easy, no-heat hairstyle instructions.
1. Beach-free waves
Especially great for getting ready in a pinch, tousled, textured tresses aren’t reserved for your next trip to the shore. Rock them from day to night without having to worry about much maintenance in between.
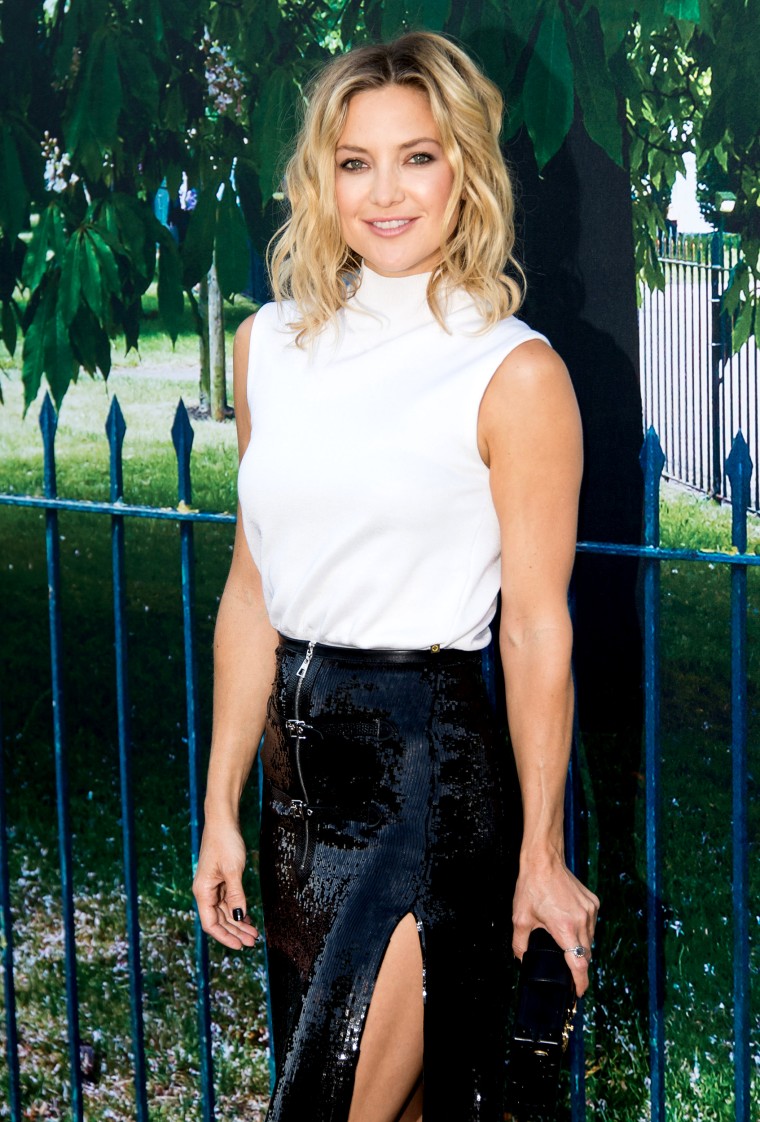
Get the Look:
- Part semi-damp hair down the middle and create two sections
- Apply products of choice (such as anti-frizz, root-lifting spray and wave-defining cream)
- On one half of the head, create four sections (without any traditional partings)
- Using the three-strand method, braid each section and secure the ends with an elastic band
- Repeat process to second half of head and let air-dry
- Once dry, unravel braids
- Use a light serum and gently finger through waves to break apart and style as desired
- Tiffany Daugherty, celebrity stylist
2. Messy fishtail braid
If you want to create a splash at the beach or that next pool party, make like a mermaid and braid a fishtail. Friends will have a hard time believing you did it yourself and it will stay put so you won’t have to waste any of that playful energy worrying about it.
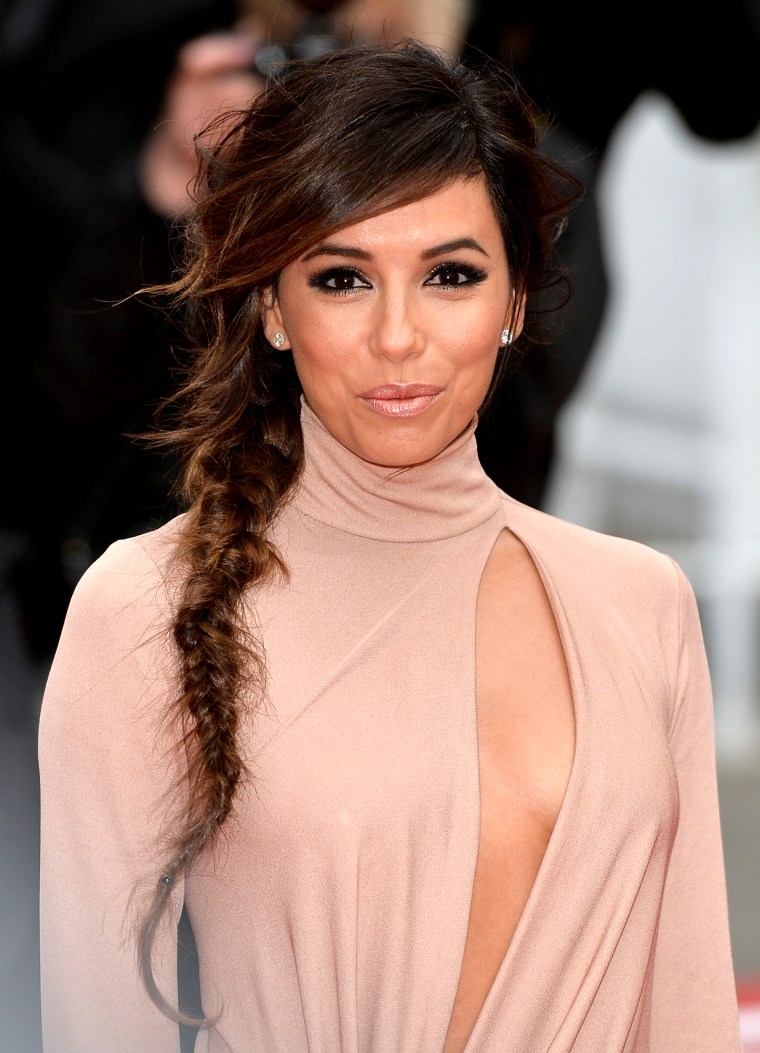
Get the Look:
- Start by sectioning hair in half and holding each section in both hands
- Begin to take a small piece of hair from the outside of the left section and cross over the middle to the right section (secure in your right hand)
- Then, take a small piece of hair from the outside of the right section cross across the middle to the left section (secure with the left hand)
- Gently repeat this process from left to right, alternating sides and crossing small pieces from the outside of each section across the middle
- Continue securing with the left or right hand until you reach the end and secure with an elastic tie
- Tiffany Daugherty, celebrity stylist
3. Half-up mini-braid crown
If you’re looking to up the ante on that half-up, half-down ‘do, just add a mini braid. We especially love this for occasions that involve dancing. Be sure to spin so the style gets the 360-degree attention it deserves.
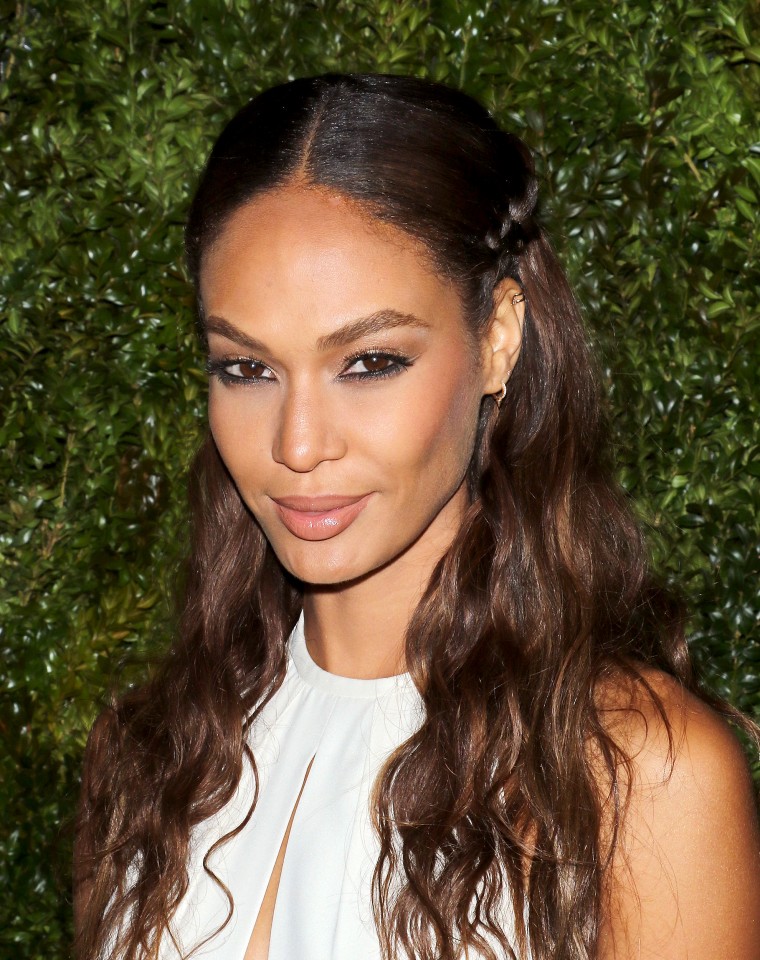
Get the Look:
- Take out pin curls that were set the night before (See #5)
- Section your hair off from ear to ear and apply a serum to the front section to help control frizz and smooth fly-aways
- To begin braids, grab a small section of hair by your sideburns and begin a Dutch Braid (inverted French Braid), adding new hair as you work your way to the back of the head
- Repeat this step for the other side of the head, braiding both braids to the end and securing each with a rubber band
- Once both braids are complete, secure them in the back of the head with an elastic or bobby Pin, and then undo the end of both braids so that the hair hangs loose
- Rake your fingers through the rest of your hair and use a texturing spray or sea salt spray to add texture and hold to your hair
- Bonus: You can also use a starch based dry shampoo which adds volume and maintains the style for days
- Cynthia Alvarez, celebrity stylist
4. Crown braid
Tress to impress (in five surprisingly easy steps) with an eye-catching and warm-weather-friendly, crown braid. We love them for music festivals and day trips alike.
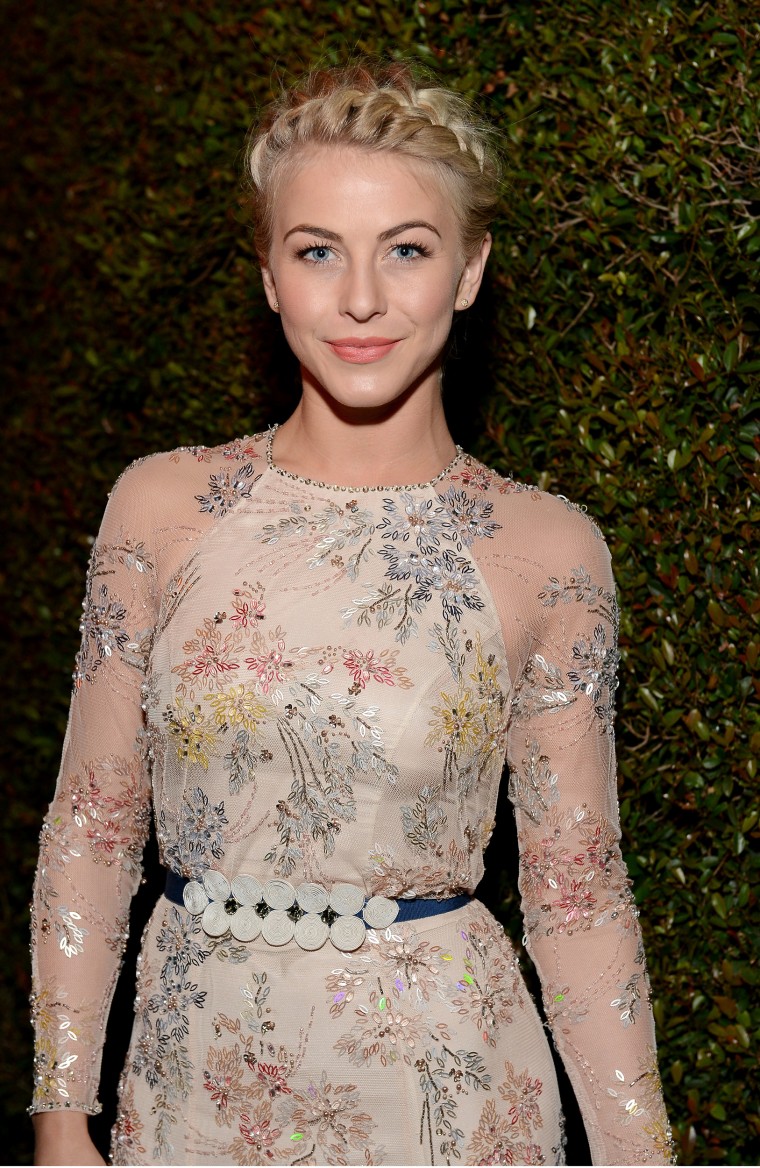
Get the Look:
- Create a side part and braid from there like a cornrow
- Take three sections and, as you go down, slide piece to piece pulling from the scalp all the way down to the back of the neck
- Then, do the same thing on the other side
- Make a ponytail at the bottom and then braid the pony all the way down
- Create a chignon from the braided ponytail
- Edward Tricomi, master stylist and co-founder of Warren-Tricomi Salons
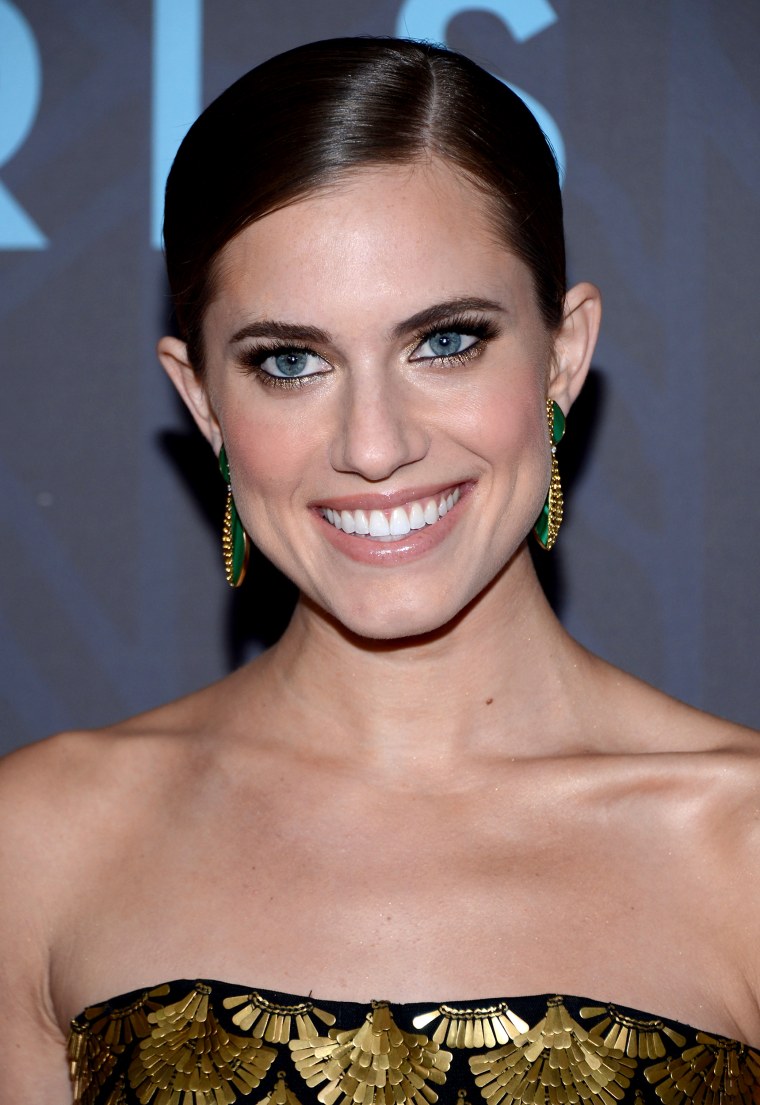
5. Slicked-back pony
Go from meek to chic in a matter of minutes with this sophisticated, yet super low-maintenance style that's perfect for weddings or a last-minute happy hour.
Get the Look:
- Starting with gently damp hair, make a part in the middle or the side (your preference)
- Apply a small amount of pomade or molding wax around the front of your hairline
- Use a bristle brush to lay and mold the hair into classic sleek ponytail and secure an elastic tie
- Once the ponytail has been secured with an elastic tie, take a small section from the ponytail and wrap around the elastic tie as many times until you reach the very end
- Use a bobby pin secure the end of the small section and hide it underneath the ponytail
- Tiffany Daugherty, celebrity stylist
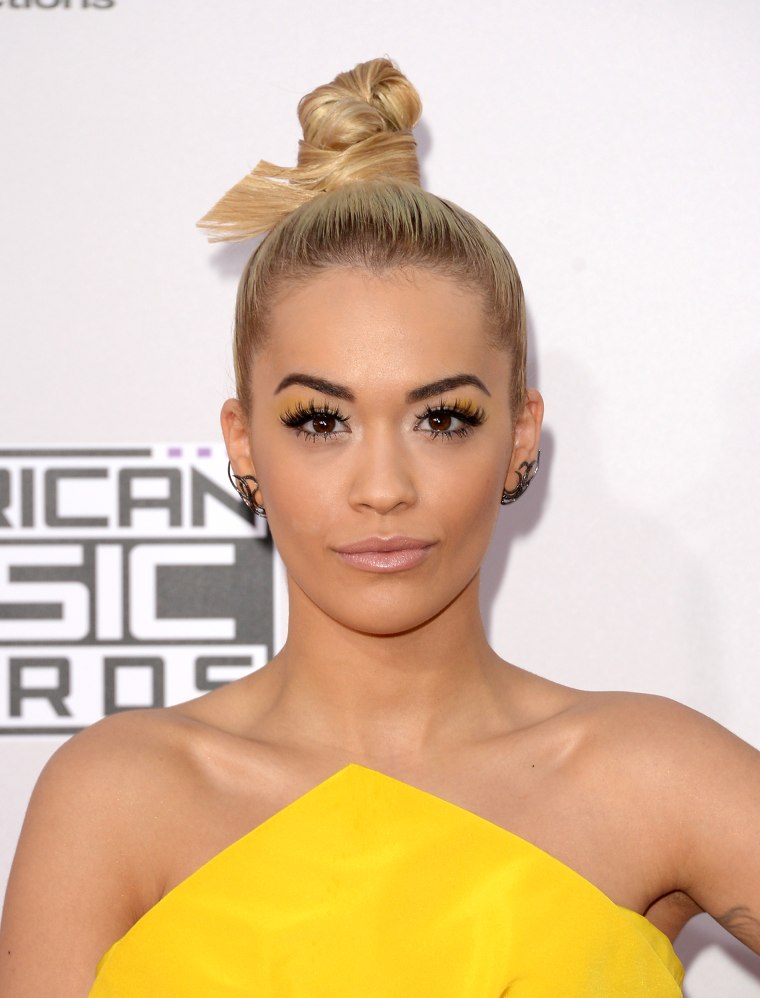
6. No-fuss knot
Last, but certainly “knot” least is one of our favorite styles for the office or a girl’s night out. Pulling off a posh style has never been so easy!
Get the Look:
- Use a bristle brush to upsweep your hair into a high ponytail, securing with an elastic tie
- Once you're has been secured with an elastic tie, wrap the length of the pony tail around in a circular motion and secure with another elastic tie
- Pull and separate the hair to create the volume and style of the easy knot you'd like
- Tiffany Daugherty, celebrity stylist