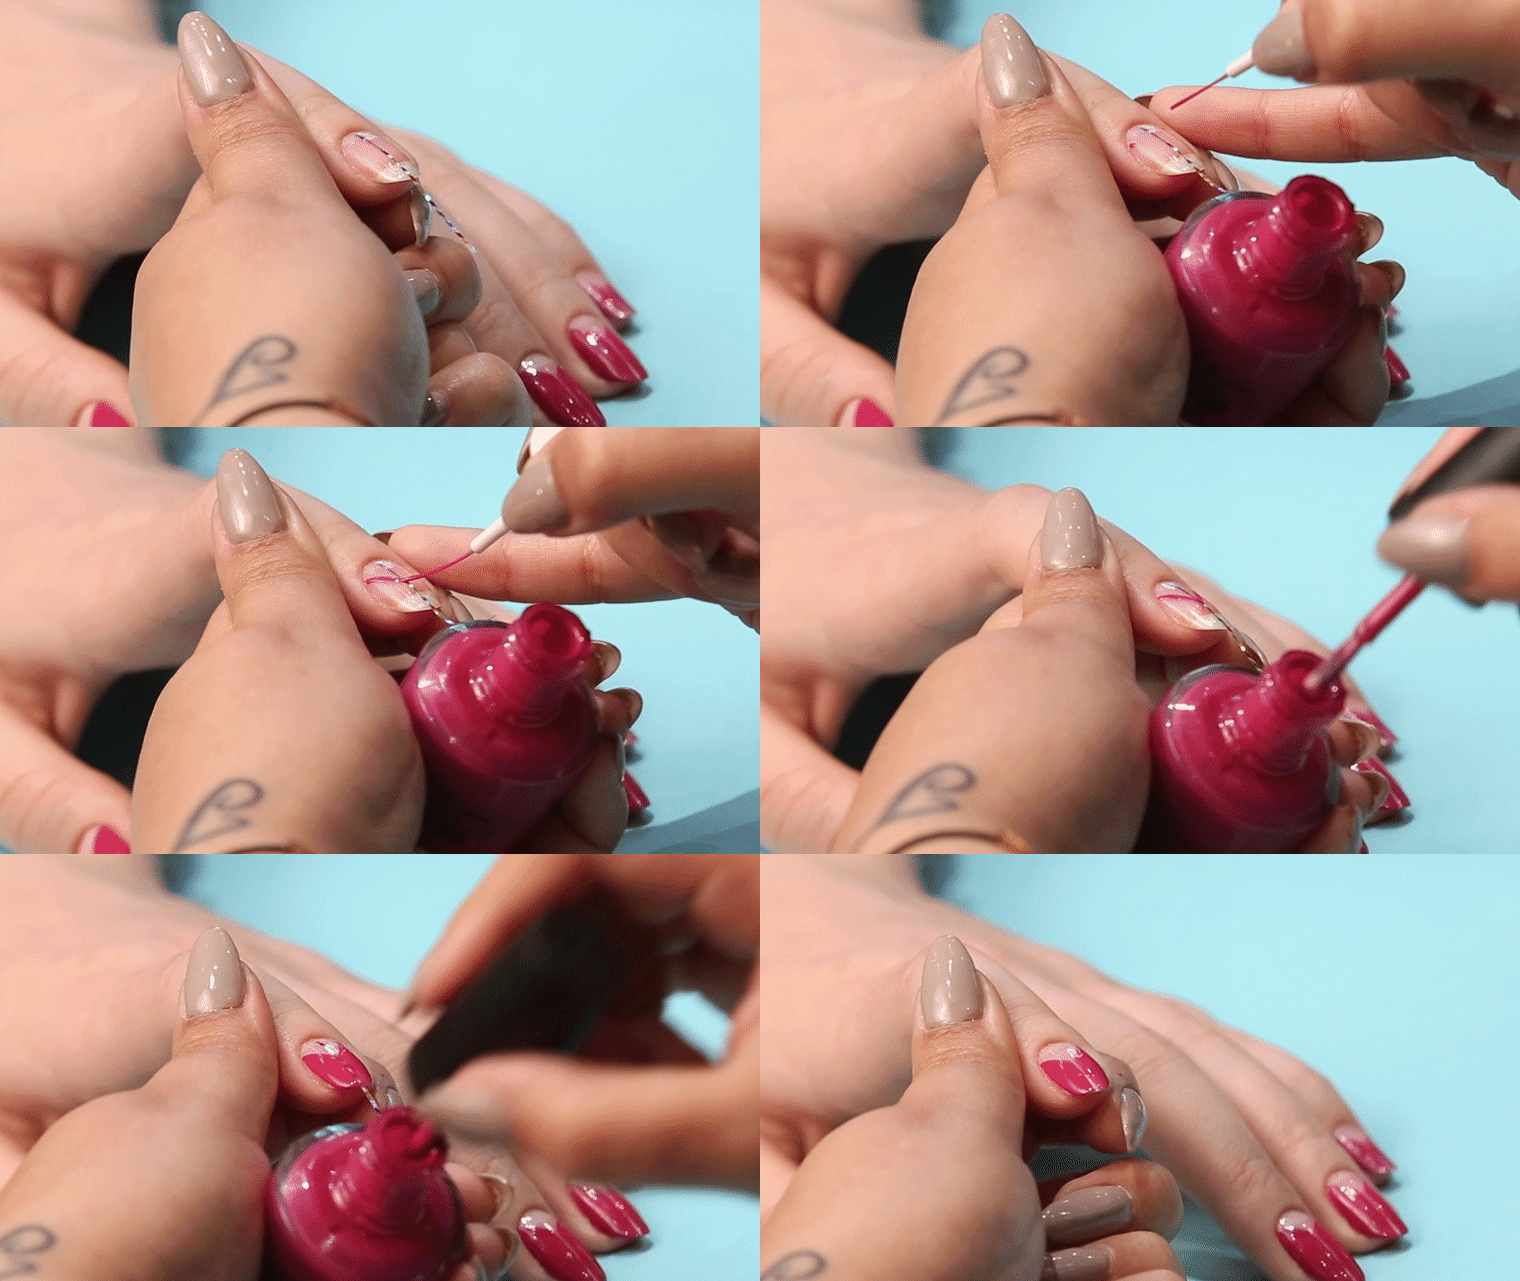
One of the hottest trends in nail art is the use of negative space — that is, using your natural nails as an accent color. What could be more beautiful than that? This design takes negative space even further with an intricate design that weaves throughout the entire nail.
With the use of a little striping tape and a precise-tipped brush, this design can create a Y-shaped pattern that makes polish really pop! The best part is, it's actually really easy to re-create.
For more gorgeous nail art tricks and tips, check out the rest of our A-Z nail "GIF"-tionary.
The experts at Paintbox gave us the step-by-step guide to creating this edgy look. Follow the instructions below to get the look at home!
Y is for … Y-shaped manicure

1. Prep the nail and apply base coat.
2. Apply striping tape in a vertical line from the tip of the nail to about two-thirds of the way to the cuticle.
3. Use a size 1 detail brush to outline a triangular shape. The bottom edge of the tape should be the point of the triangle while the cuticle should be the base.
Pro tip: It doesn’t need to be perfect just yet — you’ll have time to clean it up later!
4. Fill in the top half of the nail using the brush included in the polish bottle.
5. Remove the tape and use the detail brush to perfect the Y-shape outline.
6. Apply top coat and allow the polish to dry fully.