Tackling home improvement projects often comes down to how much time you actually have, and let's face it, time is a hard thing to come by.
Whether you have one hour, one day or one weekend to work on your house, Kevin O'Connor, host of "this Old House" and "Ask This Old House," is here to help. For TODAY's series "Design Your Life," O'Connor stopped by to share what you can complete depending on your time frame.
RELATED: Property Brothers showcase 3 ways to create backyard bliss
One-hour project: Quiet those squeaky floors

Squeaky floors are usually caused by the plywood underneath the carpet or wood floor coming slightly loose and rubbing against the house’s structure. By re-securing the plywood subfloor with special screws, a homeowner can eliminate squeaks.
Step by step
- Locate structure: Use a hammer to locate floor joists below your feet- a hollow sound indicates there isn’t structure, a solid sounds indicates that there is (this can be verified with a tool included in the kit). Once you’ve located one joist, the next one will usually be 16” or 24” away (depending on the house). You can use string to mark joist locations temporarily.
- Drive screw: The kit comes with a special driver tip and tripod tool that together help set the proper depth of the screws. Using an electric drill, drive the screws included in the kit as far as possible.
- Break off screw: The tripod tool also has a notch on its side. Place the screw head you’ve driven into the floor into that notch and rock back and forth until the screw head breaks off just below the floor level so you won’t see or feel anything. Discard the broken off screw head and repeat the above steps until all squeaks have been eliminated.
Where to find it
- Squeeeeek No More Floor Repair Kit, $20 at The Home Depot
One-day project: Build your own bookshelf

Building your own bookshelf can be a tricky woodworking project, but by replacing some of the wood elements with black iron pipe, you can easily build your own book shelf without needing specialty woodworking knowledge or tools and the piece looks unique.
RELATED: At Home with TODAY: The Property Brothers welcome you to their shared pad
Step by step
- Cut down butcher block: A slab of butcher block is designed to cover a countertop, but by cutting it into quarters, it becomes the shelf pieces. Cut the butcher block in half length-wise, and then half those pieces width-wise.
- Drill holes for pipe: Using an electric drill and a 1 1/8-inch drill bit, drill four holes per shelf, one in each corner. A portable drill press attachment for your drill can ensure perfect alignment
- Apply finish: Sand each piece of butcher block using at least a 120 grit sandpaper, wipe off sand residue, then apply two coats of wipe-on polyurethane finish, allowing time for each coat to dry.
- Build the pipe supports: For the lower level, thread together a floor flange, a short pipe nipple, and a coupling to build the legs. Feed a 12” piece of ¾” black pipe through the holes in the first shelf and thread those pipes onto the leg assembly. For the next shelf, thread on another coupling, then add the shelf, then thread on another long pipe. This process can be repeated for as high as you’d like the shelf.
- Cap the supports: After the final shelf has been installed, use a 2 ½” black pipe nipple to connect to the coupling supporting the top shelf. Install an end cap on top of the nipple to complete the assembly.
Where to find it
- 3/4-inch black steel pipe is sold at hardware stores and home centers. For the shelf we made, you’ll need to buy 4x floor flanges, 4x close nipples, 16x couplings, 12x 12” pipe, and 4x end caps.
- We used Karlby Oak butcher block, $99 from IKEA.
One-weekend project- Build and plant a raised garden bed

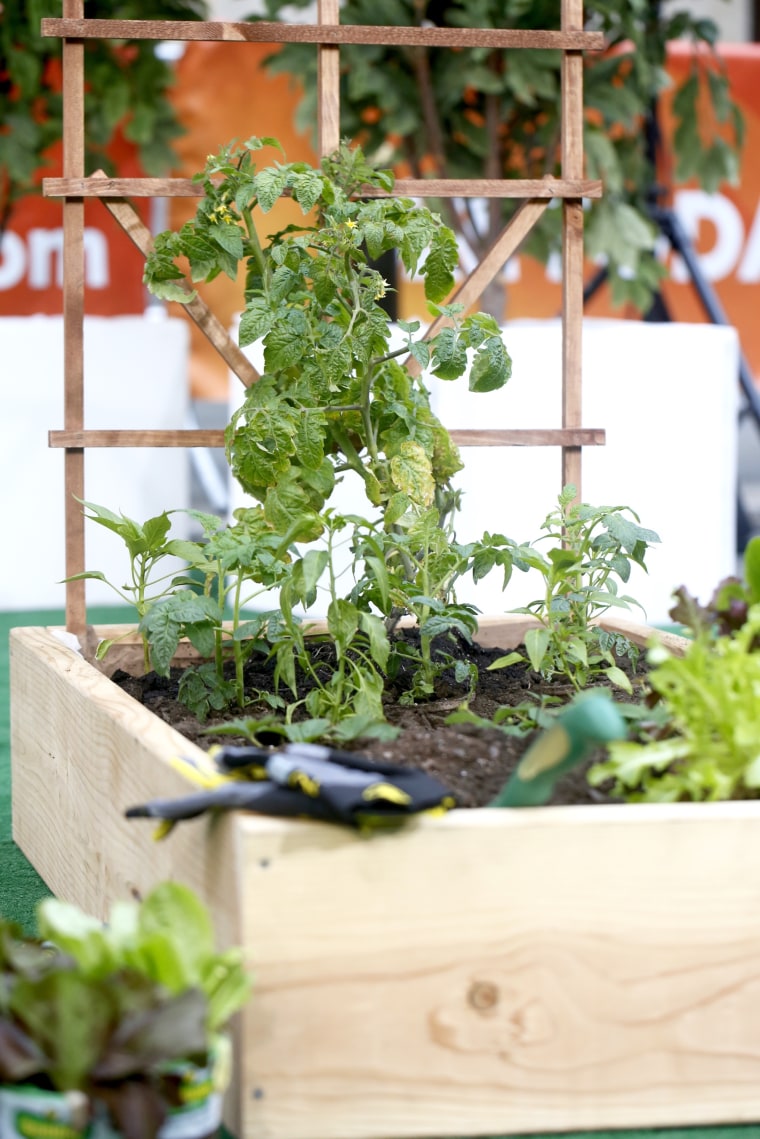
Raised beds allow you to control the soil- giving you the perfect amount of nutrients for your plants and avoiding toxins (like lead) that may be in your soil- perfect for growing fruits and vegetables in the backyard.
Step by step
- Clear an area for the beds: You should select an area in your yard that gets full sun or mostly full sun. Remove all grass from the area where you’re building your raised bed.
- Cut and screw boards: Use 2-foot-by-10-foot lumber (fir, cedar, or redwood are preferred, avoid pressure treated) for the sides. You can use any length, but do not exceed 48” width to allow easy access for weeding and harvesting. With 2x10s cut to length, secure them together using 3” exterior rated screws.
- Attach trellis: A trellis can be store-bought or homemade, and it gets screwed to the back of the bed. It can act as a support for tomato plants and other climbers like grapes and hops.
- Fill the beds with soil: An organic garden soil is the best bet, and it includes many vital nutrients to cut down on fertilizing needs. Fill soil to about an inch below the top of the lumber.
- Add plants: You can plant seeds or buy seedlings from a home center or garden center. If planting seedlings, dig a hole as deep as the container and tease the roots by hand or with a hand cultivator to encourage outward growth. Tomato and pepper plants can be planted deeper than their containers, as new roots will emerge anywhere the stem is buried.
- Water plants: Keep your plants well hydrated and you’ll be harvesting your own vegetables in a few weeks.
Where to find It:
- 2-foot-by-10-foot lumber can be purchased from a lumber yard or home center.
- Trellises can be purchased pre-made at a home center.
- Organic garden soil is sold by the bag at home centers, or in bulk from landscape suppliers.
- Seeds and seedlings can be purchased in season at home or garden centers.
- More information, including step-by-step video available here.