Take a walk down memory lane with these recipes of classic childhood desserts from Jennifer Steinhauer's cookbook "Treat Yourself."

Candy dots
- 2 cups powdered sugar
- 1 large egg white
- Assorted tubes of gel food coloring
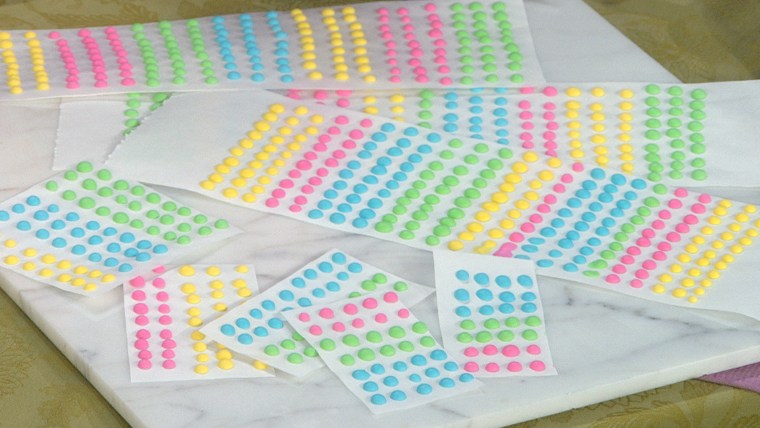
1. In the bowl of a heavy duty stand mixer fitted with the whisk attachment, combine the powdered sugar, egg white and 3 tablespoons of water. Beat on high speed for 5 minutes, or until the mixture is thick and glossy, almost holding stiff peaks. Divide the mixture evenly among 4 small bowls, about ¾ cup in each bowl. Tint each bowl a separate color as desired and transfer each batch to a piping bag or freezer bag.
2. Cut four sheets of freezer paper, each 5-inches wide and about a foot long. Using clear tape, tape each strip to a work surface with the nonshiny side of the freezer paper up. Snip small holes at the tip of each piping bag. Starting at the bottom of each sheet, pipe long rows of small dots, about the size of a pencil eraser, spacing the dots about ⅓ inch apart. Pipe rows of alternating colors in dots. Allow the candy to dry completely, about 2 hours.
3. Once the candies are dry, carefully remove the tape from the edges of the paper and cut each of the four sheets of freezer paper into six 3-inch by 5-inch pieces. Store in an airtight container for up to 5 days.

Mallomars
For the cookie:
- 2 cups whole wheat flour
- ½ cup all-purpose flour
- 1 cup (packed) light brown sugar
- ½ teaspoon baking powder
- ½ teaspoon baking soda
- ½ teaspoon salt
- ½ cup (1 stick) cold salted butter, cut into small pieces
- ½ cup cold whole milk
For the filling:
- 20 large marshmallows, halved crossways
For the chocolate coating:
- 1 cup (2 sticks) salted butter
- ½ cup cold half-and-half
- 4 cups semisweet chocolate morsels
In a food processor, pulse the whole wheat and all-purpose flours, brown sugar, baking powder, baking soda, and salt together 3 to 5 times, until just combined. Add the ½ cup of cold butter pieces and pulse 15 to 20 times, or until the mixture resembles coarse meal. Add the milk all at once and process just until the mixture forms a ball, about 20 seconds.
Divide the dough into two equal batches and roll each between two sheets of parchment paper to a thickness of ¼ inch. Place the dough on a baking sheet, and refrigerate for 30 minutes to 1 hour.
Preheat the oven to 325 degrees. Line two baking sheets with parchment paper.
Working with one batch of dough at a time, cut circles using a 2-inch round cutter. Set cookies 1 inch apart on the prepared baking sheets. Bake for 10 to 11 minutes or until the cookies are just set. Let cool completely on wire racks.
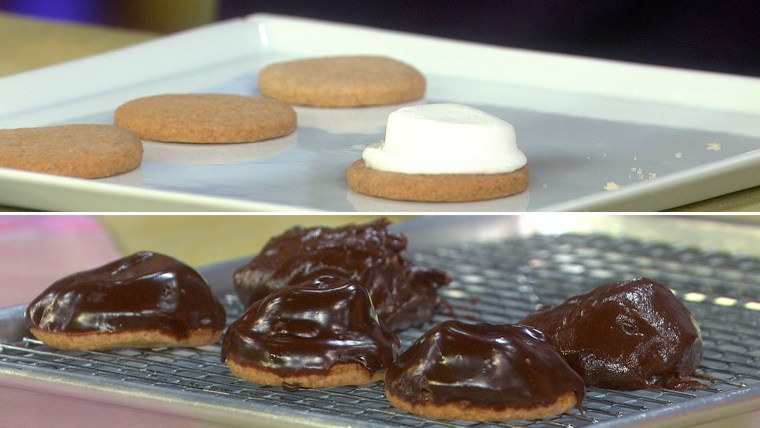
To make the filling, place half a marshmallow on top of each cookie, cut side down. Working in batches, place the marshmallow-topped cookies on a microwave-safe plate and microwave on high for 5 seconds, then check. Continue to zap in 5-second intervals until the marshmallows are good and soft but not totally melted. Let the cookies sit at room temperature until the marshmallows cool to room temperature, about 10 minutes.
To make the chocolate coating, cut the 1 cup of butter into 4 pieces and place in a medium heatproof bowl. In a small saucepan, bring 2 to 3 inches of water to a boil over medium heat. Turn the heat off and place the bowl of butter over the saucepan. Stir constantly until the butter melts. Add the cold half-and-half and stir until combined. Pour the chocolate morsels into the melted butter, stirring constantly until the chocolate melts and the mixture is smooth.
Carefully dip each marshmallow-topped cookie into the chocolate, turning with a fork or offset spatula to cover all sides and allowing the excess chocolate to run off. Place the dipped cookies on a wire rack to set. Let set completely before storing. Store in an airtight container for up to 2 days.

Sno balls
For the cake:
- ½ cup salted butter
- 1 cup granulated sugar
- 1 large egg
- ½ cup cocoa powder
- 1¾ cups all-purpose flour
- ½ teaspoon baking soda
- ¼ teaspoon salt
- ¼ cup whole milk
- 40 mini marshmallows
For the topping:
- 2½ cups sweetened coconut flakes
For the frosting:
- 1½ cups marshmallow fluff
- ¾ cup salted butter, softened
- 3 cups powdered sugar
Preheat the oven to 325 degrees. Grease a doughnut hole pan with unsalted butter.
In a heavy-duty stand mixer, cream the stick of butter and the granulated sugar together on medium speed just until light and fluffy, about 1 minute. Add the egg and mix just until combined. Stir the cocoa and ⅓ cup hot water together until smooth. With the mixer on low speed, add the cocoa mixture to the butter mixture, stirring for an additional 10 seconds.
In a separate bowl, whisk together the flour, baking soda and salt. With the mixer on low speed, gradually add the flour mixture to the butter mixture in batches alternating with the milk, beginning and ending with the flour and beating after each addition until the ingredients are just blended.
Scoop a heaping tablespoon of batter into each doughnut hole cavity. Place a marshmallow into the center of each scoop of batter and cover the marshmallow with batter, ensuring that each marshmallow is completely coated. The pan hole should be two-thirds full. Bake for 10 to 12 minutes, or until the cakes are set. Remove the pan from the oven, but keep the oven on to toast your coconut. Let the cakes cool in the pan on a wire rack for 10 minutes, then gently lift the cakes from the pan, placing them back on the wire rack to cool to room temperature.
Place the coconut flakes on a parchment-lined baking sheet and bake in the oven for about 10 minutes, or until the flakes starts to turn golden brown, but no darker.
With a stand mixer or an electric hand mixer, beat the marshmallow fluff, the ¾ cup of butter and the powdered sugar for 1 minute at medium speed until light and fluffy. Transfer the frosting to a piping bag.
Place the cooled cakes, spaced generously apart, on a wire rack set over a rimmed baking pan. Starting at the base of each cake, pipe a spiraling circle of frosting around the cake, ensuring that it is completely covered in frosting. (You can use your damp fingers to smooth frosting over any gaps.)
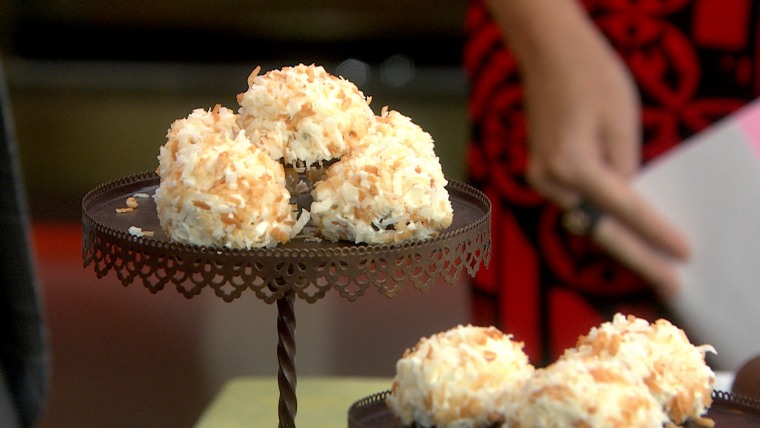
Use your paws to lightly pack each cake in toasted coconut so that each entire cake is covered completely in coconut. (Don’t just roll the cakes, or the coconut won’t quite stick.) Use the rimmed baking sheet to catch any coconut flakes that fall through the wire rack, which can be applied to any semi-naked cakes. Store in the refrigerator for up to 1 day.
Strawberry pop-tarts
For the crust:
2 cups all-purpose flour
¼ cup cornstarch
¼ teaspoon salt
3 tablespoons sugar
1 cup cold unsalted butter, cut into small pieces
- 2 tablespoons sour cream
For the filling:
- ½ cup strawberry jam or preserves
- 1 large egg, lightly beaten
In a food processor, pulse the flour, cornstarch, salt, sugar, and butter together 10 to 12 times, or until the mixture resembles coarse crumbs and only pea-size or smaller pieces of butter remain.
Stir the sour cream and 2 tablespoons of ice water together. Pour into the dough mixture in the food processor and pulse another 4 times. Remove the dough from the bowl and shape it into a disk slightly less than 1-inch thick. Wrap the disk in plastic wrap and refrigerate for 1 hour, or up to 1 day. If refrigerating for more than 1 hour, let the dough rest at room temperature for at least 15 minutes before rolling it out.
Preheat the oven to 350 degrees. Line a baking sheet with parchment paper. Using a ruler, trace a 3-inch by 4-inch rectangle onto a piece of parchment paper or card stock and cut it out with scissors.
Roll the dough out to a thickness of ⅛ inch, and use your template to cut out 12 rectangles, recombining and re-rolling the dough as necessary.
Place 6 rectangles of dough on the prepared baking sheet 2 inches apart. Divide the strawberry jam evenly among the rectangles. Then, using a spoon or offset spatula, spread the jam evenly over each rectangle, leaving a ½-inch edge free of jam around the perimeter. Using your finger or a small pastry brush, run a line of the beaten egg around the jam-free perimeter of each strawberry-covered rectangle. Cover each rectangle with one of the plain rectangles and press the edges firmly together to seal. Use the tines of a fork to score the edges over the seal.
Bake the tarts for 23 to 25 minutes, or until the tarts are a light golden brown. Let cool completely on a wire rack. Store in an airtight container for up to 2 days.